




How to prevent and treat cannabis light burn?

- 1. How to identify light burn
- 1. a. Bud bleaching
- 1. b. Yellow leaves
- 2. Light placement
- 3. What is light burn?
- 4. How to identify light burn?
- 5. How to prevent light burn?
- 5. a. Use a lux meter
- 5. b. And what about ppfd for autoflowers?
- 5. c. Dli (daily light integral)
- 5. d. Low-stress training
- 5. e. The tie-down method
- 5. f. Scrog
- 6. Cannabis light burn recovery
- 7. What can influence light burn?
- 8. In conclusion
Light burn or light bleaching is a serious problem if you’ve got a room full of cannabis plants. Light serves as food for the plants, but it can also be an issue if it goes overboard. Think of it this way – humans need food for energy, but what happens if you eat too much? Yep, you’ll have several problems, from obesity to diabetes. Similarly, cannabis plants use light as food, but if you install too many lights or hang them too close to the plants, you may end up bleaching your plants.
Before proceeding, it helps to know the difference between light burn and light stress. As the name suggests, light burn results in tissue damage directly resulting from the heat emitted from a light source. While some lights, such as LEDs, produce very little heat, other types of lamps generate enough to burn leaves when they’re in close enough proximity. In contrast, light stress (another condition that can hurt plant performance and yields) is caused by an excess of light, without heat playing a major role in the equation.
Technically speaking, feminized seeds cannot receive too much light. However, plants don’t conduct photosynthesis for free! In order to convert light into vital sugars, plants also need adequate amounts of water and carbon dioxide. When exposed to a lot of light, plants need enhanced levels of these resources. This is why some growers add supplemental carbon dioxide to their growing space. The accelerated growth that occurs under strong lights also requires higher amounts of key macronutrients and micronutrients. When a grower subjects a plant to a very strong light source but doesn’t increase water, carbon dioxide, and nutrients, plants undergo light stress. The symptoms of this condition include yellowing and browning leaves. Now, you’re aware of the key differences between light stress and light burn. So, let’s learn about the latter! If you notice your plants struggling in 2026, keep reading to figure out how to prevent and treat cannabis light burn.
1. How to Identify Light Burn
Light burn is fairly easy to identify, as the symptoms are evident. The most common symptom when talking about light burn is a yellowish/white spot on the top buds.
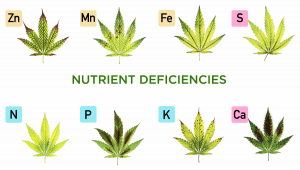
But there are other signs to watch out for. Learning about the signs of different conditions will help you excel as a grower, whether you’re a beginner at the start of your journey or a green veteran with years of cultivation experience. Getting to know what to look out for will help you quickly identify a host of different problems, including the signs of specific pests and diseases and nutrient deficiencies. Once you know what the symptoms look like, you’ll know exactly how to go about treating your precious plants.
The same applies to light burn. This condition displays some very recognizable symptoms that serve as prompts to rearrange things within your growing space. Catch these signs early, and you’ll have the power to minimize any damage and increase the chances of healthy plants and a successful harvest. So let’s understand why this happens.
Bud Bleaching
One of the easiest symptoms that’ll help you identify light burn is the bleaching of the buds. This usually happens on top buds when the lights are too close to the canopy, making flowers look completely white or albino. Despite looking interesting, in most cases, your buds will lose potency and flavor as the high-intensity lighting will degrade the terpenes and cannabinoids, making your bud taste like hay in some cases.
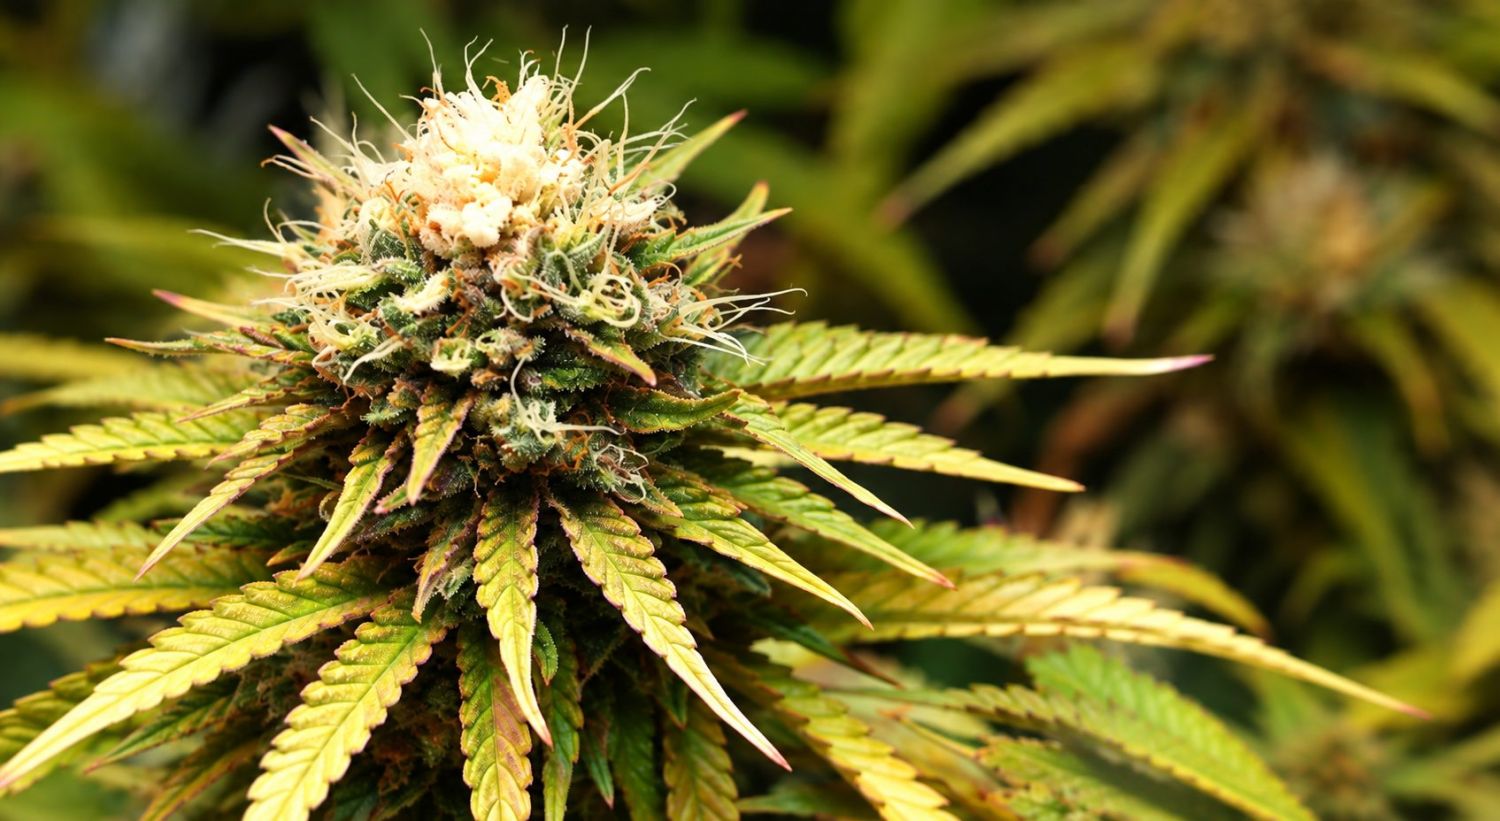
Remember that it’s not only light burn. Excessively hot temperatures will also cause terpenes and cannabinoids to degrade.
Yellow Leaves
Symptoms of light burn also include yellowing of the fan leaves, but it could be harder to identify your plants are suffering from light burn this way, as the yellowing of the leaves can also be a nutrient deficiency. The main thing you should keep in mind is that nutrient burn usually starts at the bottom, while light burn will appear at the top, and the leaves will not appear sick, only discolored. But it’s not just these particular phytochemicals that become damaged and lost. The white color starts to occur because chlorophyll itself becomes damaged by the heat and high-intensity lighting.
In case you weren’t aware, chlorophyll is a pigment found within plant tissue that is at the center of photosynthesis. It appears green to the human eye because it reflects green light. When damaged, plant tissue appears white and yellow instead of green. Thankfully, light burn is almost always localized to the tallest part of the canopy that is the closest to the hot light source. Once you readjust your light distance, you’ll give some of the tissue at the top of the canopy the chance to recover.
2. Light Placement
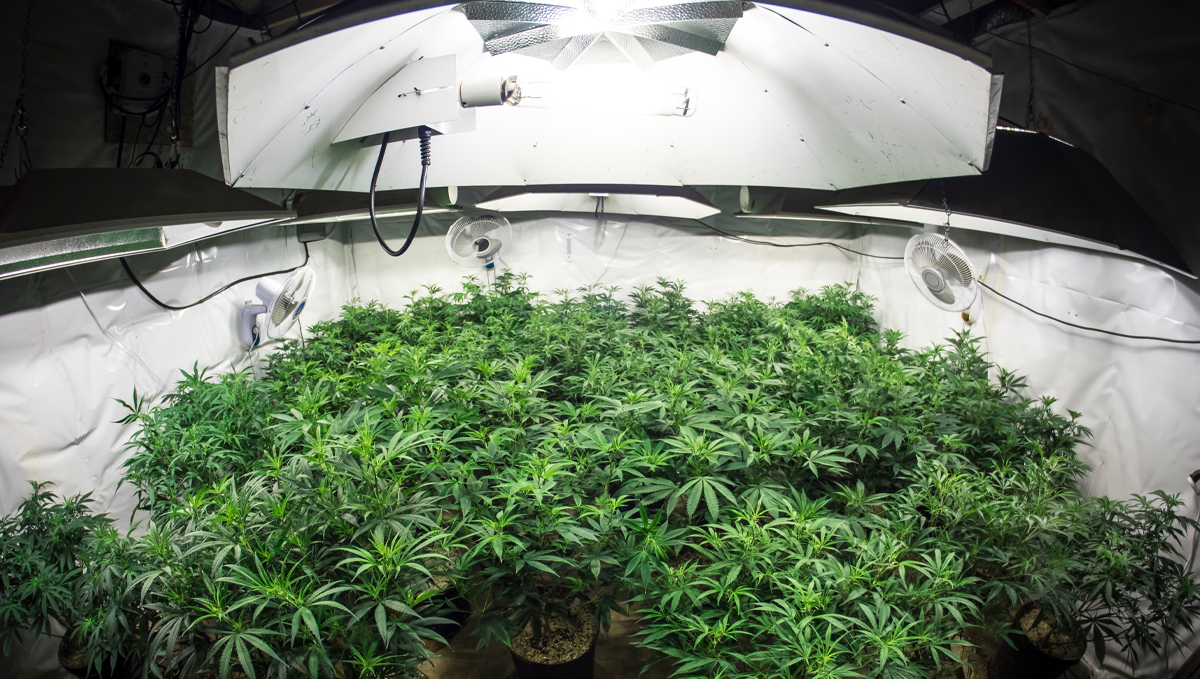
It doesn’t matter if you’re growing under HPS or LEDs. You should always follow the manufacturer’s recommendations because if you don’t have reflective walls or a lot of lights, the light intensity will be reduced and can end up affecting the yields.
Reflective walls
Although the distance between your grow lights and plants can affect yields, reflective walls can help minimize this impact by bouncing light back toward your plants, reducing light loss when you raise the lights higher above the canopy.
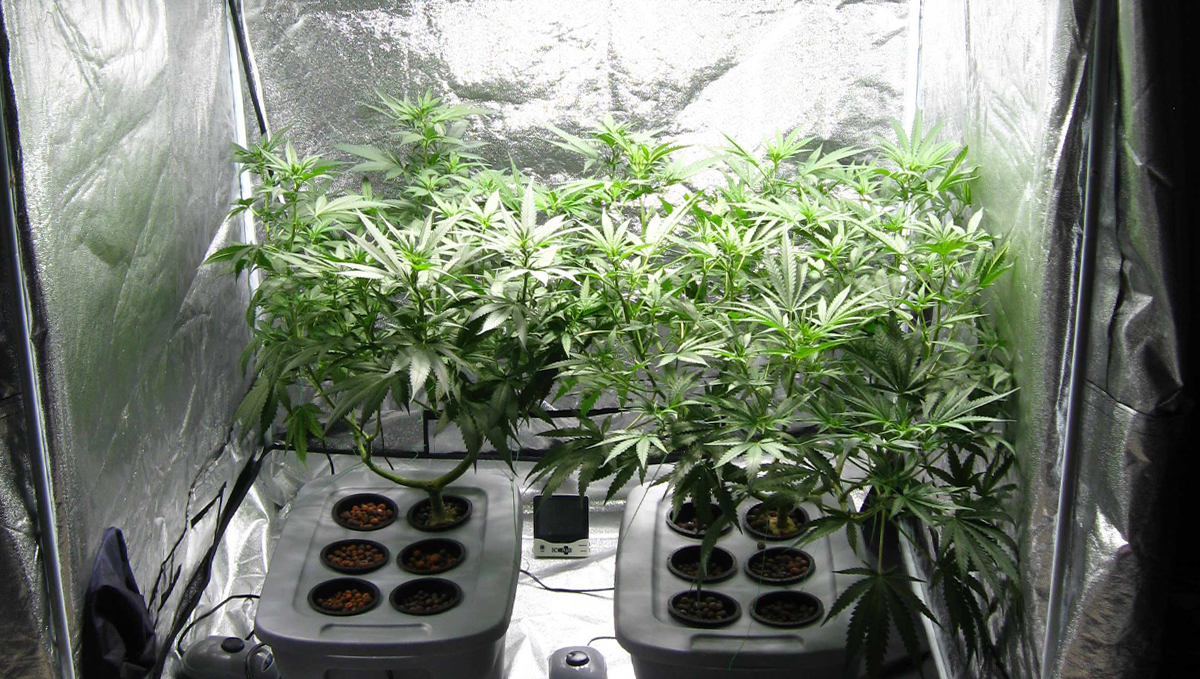
This means that when using effective reflective walls, you can place the lights higher without losing as much light intensity as you would when growing without them because when light bounces back, it will reach your plant from different angles, allowing even deeper penetration into the canopy.
Overlaying lights
If you’re using many lights in a room with reflective walls, it’s more effective to hang them higher because your plants will get light from many angles, enhancing light penetration and improving yields.
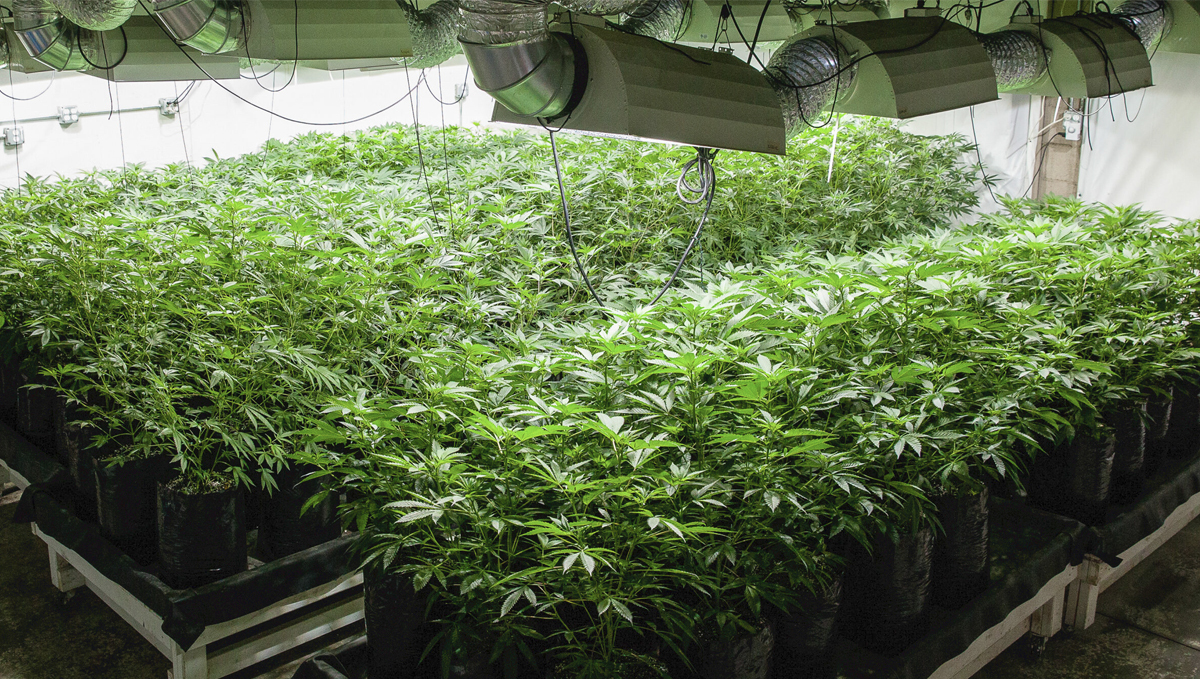
Obviously, this is more suited for commercial growers who can afford to have grow rooms with several lights, although some home growers have big grow tents and can benefit from having reflective walls and several light fixtures.
3. What Is Light Burn?
Light burn is nothing but light bleaching. You’ll notice that the leaves too close to the light turn white or look bleached. Plants growing outside cannot suffer from light burn because the sun is too far away from the Earth to burn the plants, and cannabis has evolved for centuries and has adjusted to the sunlight enough to not get burnt.
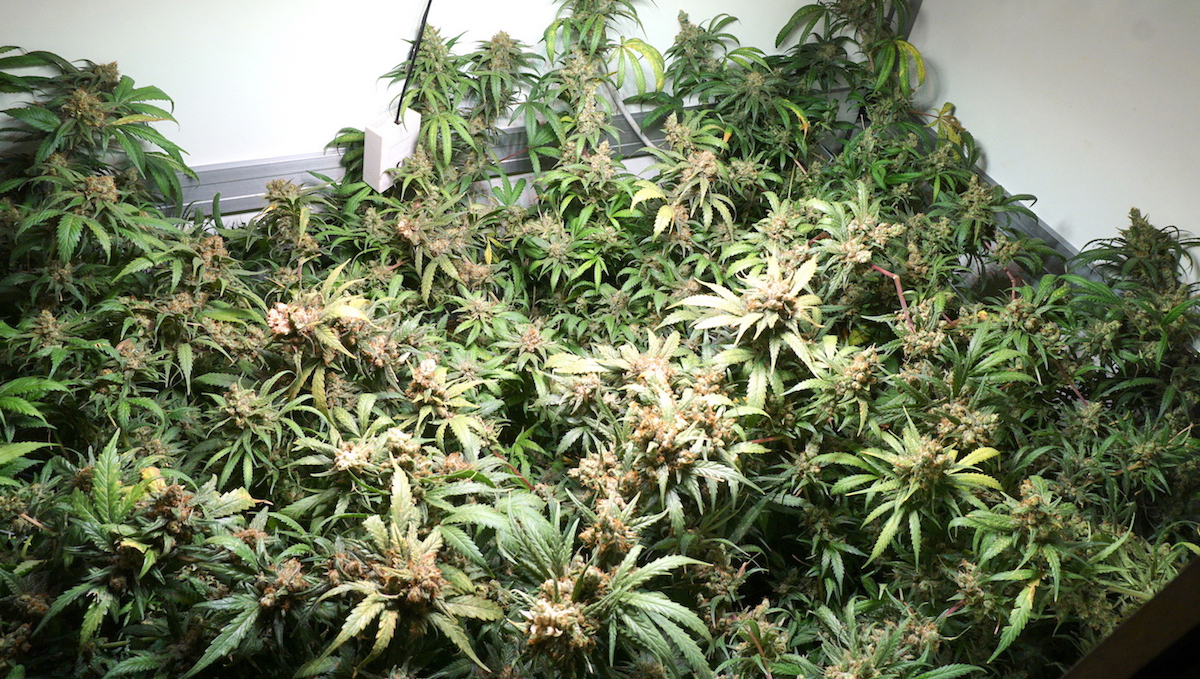
However, weed light burn can also happen indoors. When the lights are hung too close to the plants, the leaves and even the buds may begin to look white or burnt. This indicates that the heat is too intense for the plants to tolerate. Although white buds may look amazing, they are actually a sign that the buds are damaged. When the lights are too close to the buds, excessive heat can degrade the resin and cannabinoids. You probably already know that excessive heat can damage plants, and buds are no exception. In fact, not only can the buds lose their potency, making them less useful for both medicinal and recreational users, but their taste can also suffer, and their fragrance may deteriorate.
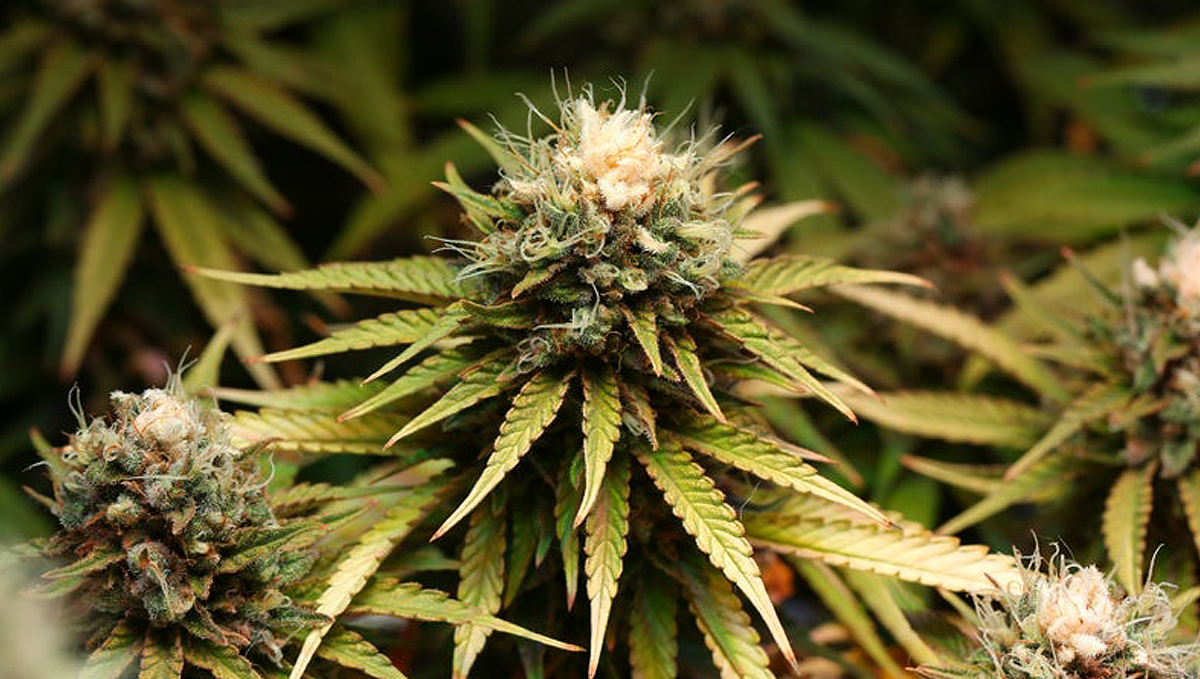
Yellow leaves can also indicate light burn at times, but do not get confused between nitrogen deficiency and light burn because they look the same. With nitrogen deficiency, though, yellowing of the leaves starts from the bottom and moves towards the top. Also, the leaves are limp and fall off from the plant without any effort. On the other hand, if they are suffering from light burn, the leaves feel crispy and are harder to pluck from the plant. Leaves turning brown and crisp is an indication of light burn too. It’s a combination of heat and too much light that fries the leaves and renders them useless to the plant.
4. How To Identify Light Burn?
Light burn symptoms in the early stages can easily be mistaken for heat stress symptoms or nitrogen deficiency, so it’s better to make sure what’s really going on with your plants before treating them. If your plants are suffering from light burn, you’ll start to see the following symptoms:
- Leaves pointing upwards.
- Bleaching on the leaves and buds, which can present as white or yellow in the parts closest to the light.
- Leaves turn yellow while the veins remain green.
5. How To Prevent Light Burn?
Prevention is far better than cure, they say. Thus, you must try to prevent light burn rather than trying to cure it. First off, light burn depends on the type of light you’re using. For instance, a CFL hung even 10 inches away from the plant will not damage the plant, and the same applies to fluorescent or T5 lights because they aren’t that powerful and don’t emit a lot of heat. However, some HID and LED lights positioned even 25cm away from the plants can ultimately kill them.
| Bulbs (HPS/MH) | Min. Distance |
|---|---|
| 150w - 400w | 30 - 45 cm |
| 600w - 1000w | 60 - 100 cm |
However, for those growing under modern LED lights, it’s not just about the distance between the lights and the plants, but also the combination of light distance and intensity. Since most modern LEDs come with dimmers, you can increase or decrease the light intensity, as well as move the lights closer to or farther away from the plants to adjust the PPFD at canopy level.
PPFD Chart For Photoperiods
| Stage | PPFD |
|---|---|
| Seedling | 100 - 300 |
| Vegetative | 400 - 600 |
| Pre-Flower/Early Flower | 700 - 800 |
| Late Flower/Ripening | 800 - 1000 |
To measure PPFD accurately, you'll need a PAR meter. While these devices aren't exactly cheap, they're highly recommended because they take the guesswork out of lighting and help you provide your plants with the right amount of light.
When in doubt, read the directions provided by the manufacturer as well. It’s better to be safe and place the plants a few inches further away in the vegetative stage to check how they fare. If you notice that they are struggling, it’s an indication that you must move the lights away. However, if you notice that they are stretching too much and go limp, it’s time to place the lights closer.

Use a Lux Meter
A lux meter isn't as accurate for measuring plant lighting because it measures illuminance, or the amount of visible light reaching a surface, based on how the human eye perceives brightness. On the other hand, a PAR meter measures the photosynthetically active light reaching your plants, giving you a much better idea of how much usable light they're actually receiving.
However, if you're looking for a lux chart, we've got you covered!
| Recommended Lux for Autoflowers | |
|---|---|
| Seedling Stage | 5.000 - 7.000 lux |
| Vegetative Stage | 15.000 - 50.000 lux |
| Flowering Stage | 45.000 - 65.000 lux |
Keep in mind that autoflowers should never get more than 75.000 lux unless you’re injecting CO2 or are dealing with a strain that can take it as most autoflowers will show symptoms of light burn under 75.000 lux or more. And remember that this is just a guideline and can vary depending on your setup and the light fixture you’re using, but it’s a base that can help you keep your autoflowers happy and healthy.
And what about PPFD for autoflowers?
Autoflowers still need plenty of light, but their PPFD requirements are slightly different because they can flower under 18 hours of light instead of the 12 hours typically used for photoperiod plants. This means you have more time to deliver the same total amount of light. Compared to a 12/12 light cycle, you have six additional hours of light, allowing you to run your LEDs at a lower intensity while still achieving the same DLI.
So when you add up 18 hs of light at 700 PPFD (µmol·m⁻²·s⁻¹), you get the total amount of light per day. That total amount of light is what we call DLI (Daily Light Integral).
PPFD Chart For Autoflowers
| Stage | PPFD |
|---|---|
| Seedling | 100 - 200 |
| Vegetative | 200 - 500 |
| Late Veg/Pre-Flower | 600 |
| Early Flower | 600 - 700 |
| Late Flower/Ripening | 700 |
DLI (Daily Light Integral)
DLI measures how much usable light a plant receives throughout the day, while PPFD (Photosynthetic Photon Flux Density) measures how much light reaches the plant at any given moment.
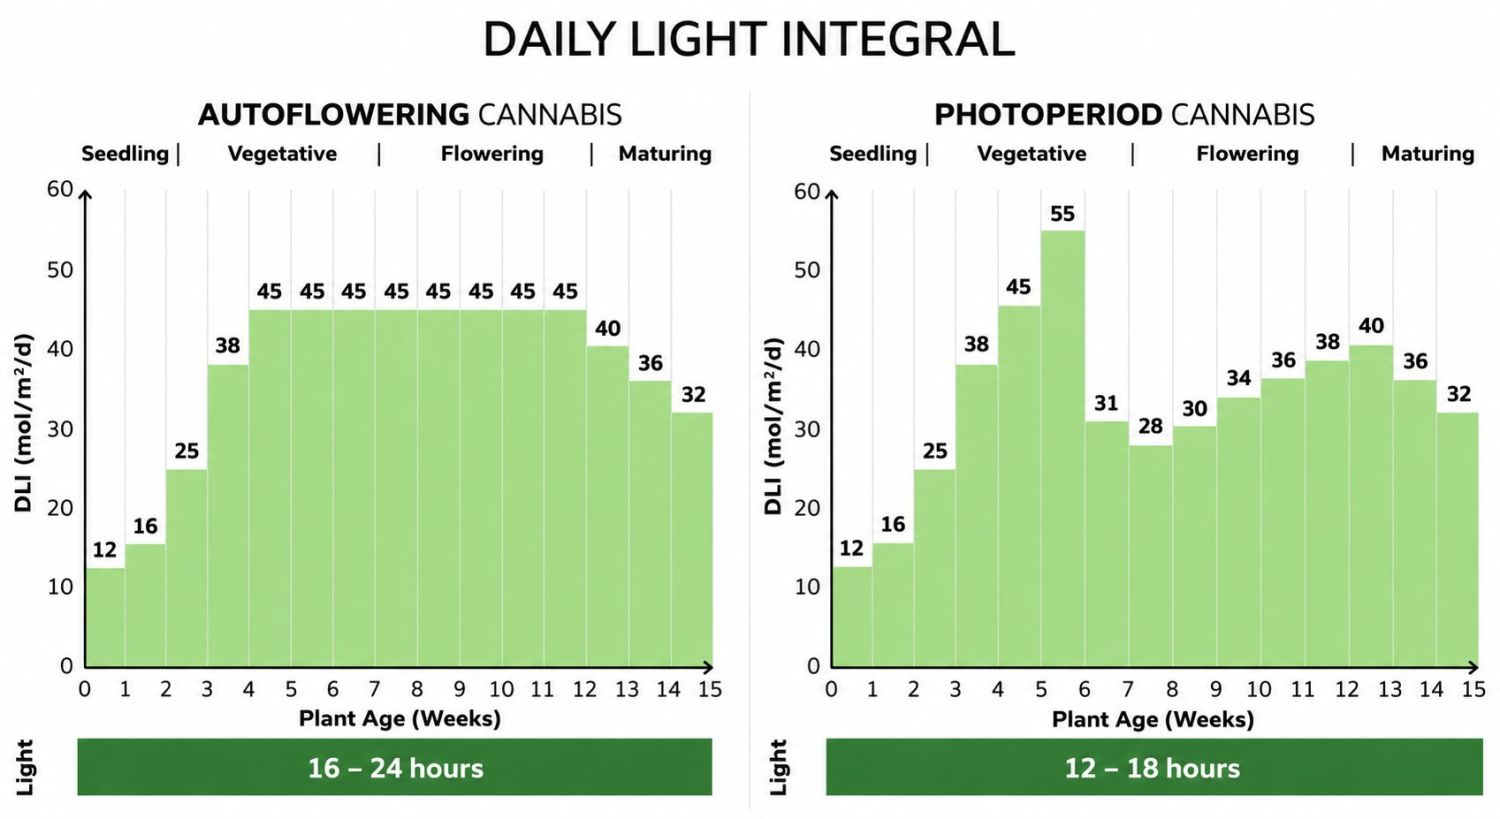
In simple terms, let's say your plant receives a PPFD of 700 µmol/m²/s for 18 hours a day. How much light does it receive in total during those 18 hours? That's exactly what DLI tells you. In this case, your DLI would be 45.36 mol/m²/day.
Just as adjusting light intensity and the distance between your lights and the canopy allows you to control PPFD, adjusting both PPFD and the number of hours your lights stay on allows you to increase or decrease DLI.
The higher the light intensity and the longer the lights stay on, the higher the DLI. By understanding this relationship and using a chart like the one below, you can ensure your plants receive the right amount of light to meet their needs.
Low-stress Training
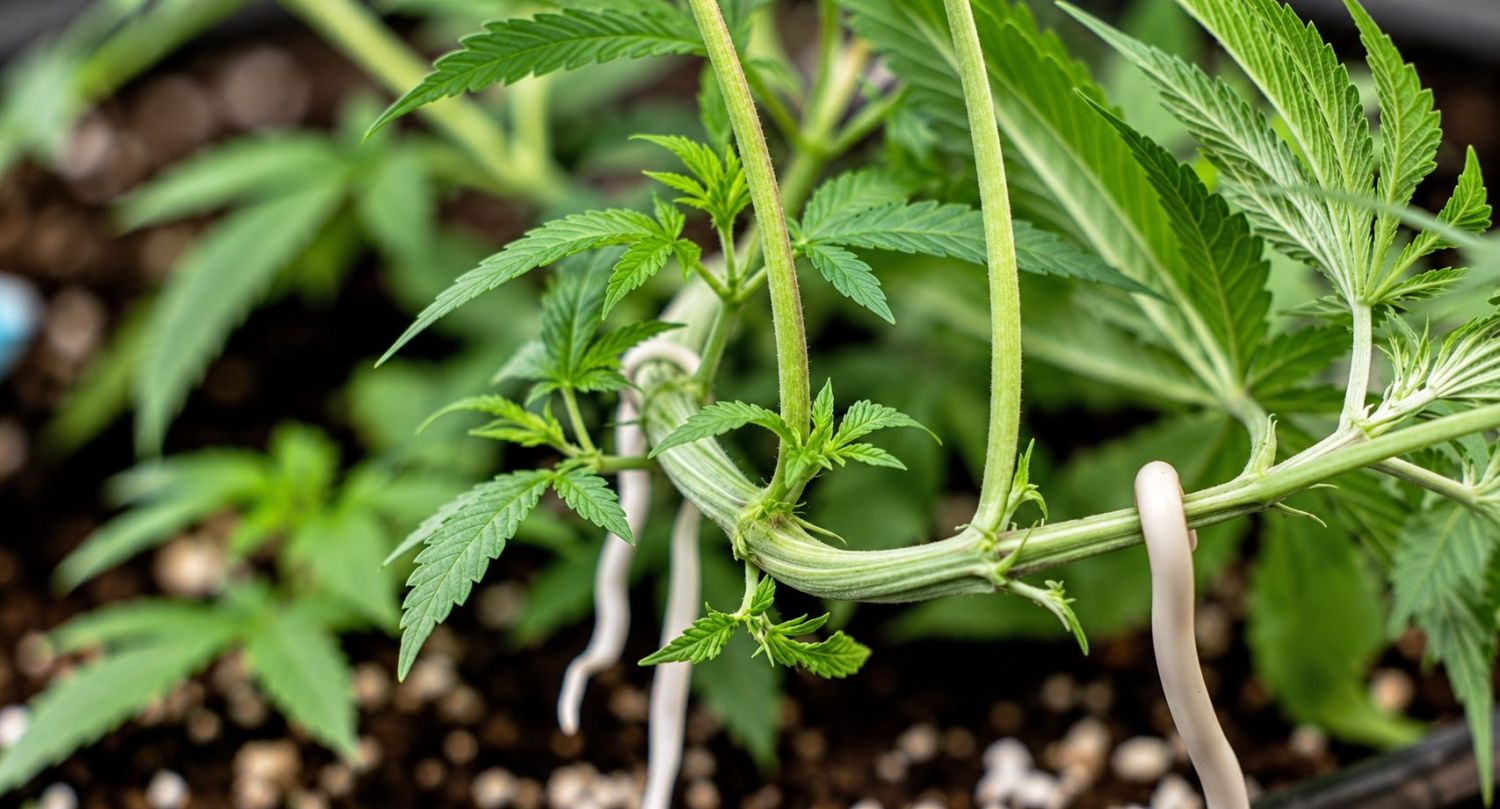
Low-Stress Training is a method where you bend the stems to the side of the container so that the light penetrates into the canopy. Since you’re going to bend the stems down, light can reach deeper to the lower buds.
As long as the wires don’t hurt the plants, you can LST them as much as your heart desires. LST works perfectly for autoflowers, but use it only during the vegetative stage. You should aim to get your plants into the desired shape before the pre-flower stretch ends. Once this stage is over, plants will generally slow down their vertical growth significantly, leaving you with fewer opportunities to adjust their shape.
The Tie-down Method
As said above, LST is a method where you bend down the branches to control height and model your plant’s structure to better fit your grow tent, and the tie-down method is the most well-known and cheapest of them all. This method consists of tying down the branches to the sides, shaping your plant sideways instead of growing vertically, and basically reaching the same results as with SCRoG but allowing you to model the plant structure as you wish to.
SCRoG
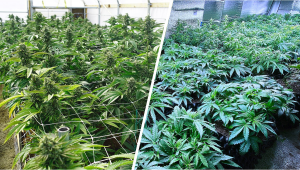
Screen of green (aka SCRoG) is an LST technique designed to control the height and improve yields. Similar to the tie-down method, it consists of bending down the branches to achieve a well-spread canopy, allowing the light to reach all the flowering sites equally, thus improving yields and plant growth.
6. Cannabis light burn recovery
There’s no light burn treatment or way to recover from cannabis light burn. Even if your buds are bleached, you can still smoke them. Also, you can remove the bleached part and smoke the rest. It doesn’t matter if it’s an LED light burn or an HPS light burn. A marijuana light burn doesn’t mean that your buds aren’t fit for consumption, but they won’t get you too high or have a pleasant taste or aroma.
Sometimes, the leaves turn completely white. In such cases, the damage is so much that it’s too late to save them. Now, this doesn’t mean you should toss your weed plants in the garbage, but you will not be able to reverse the damage done. If you notice the first few signs of the leaves turning white, you’re in luck. For one, you can move the lights away and water the plants to help them restore all the moisture they have just lost; you can also install cooling fans to reduce the heat produced by the lights.
This is also why most growers shy away from HID lights. HID lights are powerful, no doubt, but the heat released is just too much for the plants, and you’ll be forced to use powerful fans and more frequent air exchange.
If the plants are young and still in the vegetative stage, it might help to cut off the tops. This method – also known as Topping and Fimming – will also reduce the distance between the lights and the plants considerably. Of course, the tops will grow back again, but you can use a combination of both LST and topping to ensure that the plants aren’t too close to the lights at all.
7. What Can Influence Light Burn?
While good environmental conditions can help minimize the effects of light burn, they cannot prevent it entirely. Light burn is primarily caused by one simple factor: too much light, whether it's because the grow lights are too close to the canopy or the light intensity is too high. To prevent this, follow the charts provided above and adjust your lighting accordingly. With the right amount of light, you'll see your plants happily “praying” toward the lights from start to finish, like these beautiful Frostbanger Auto in the video below.
8. In conclusion
Have in mind that cannabis light burn is not a disease like mold or the Tobacco mosaic virus, light burn, or light bleach, is a symptom that appears when your light fixture is too strong light or the colas grow too much and touch the lights. Now, this is more common when growing with light bulbs but can also happen with top-quality LEDs, so make sure you have enough horizontal space and know approximately how tall your plants will grow before starting your grow cycle.
This isn't a huge problem because it can be solved with LST techniques or just by rating your light fixtures, but as always, it's better to prevent than to remedy. The distance between the light fixture and the canopy is vital for plant growth. If you have the lights too high, your plants won’t grow properly, and if they’re too close, they can end up harming your plants, so you need to experiment to find the sweet spot. If you have grown cannabis with both HPS and LEDs, feel free to share your tips and tricks with fellow growers. Leave a comment in the comment section below!
FAQ
The first signs of cannabis light burn often appear on the uppermost leaves and buds, especially those closest to the grow lights. They may develop pale green or yellow patches, while their edges may begin to curl upward. In more severe cases, the leaves and buds can turn white due to bleaching.
Yes, cannabis plants can recover from mild light burn once the excessive light exposure is corrected. However, severely bleached or damaged leaves and buds generally won't return to their original condition. Recovery is usually indicated by healthy new growth rather than damaged tissues becoming green again.
The first step is to identify and correct the source of excessive light exposure. This may involve reducing light intensity or increasing the distance between the grow lights and the canopy.
Light burn is primarily caused by excessive light intensity and will cause direct damage to the plant, while heat stress results from temperatures exceeding what the plant can comfortably tolerate. Light burn often causes bleaching or yellowing near the top of the canopy, whereas heat stress commonly causes leaf curling, wilting, and drying. Both problems can occur simultaneously.
Yes. When PPFD exceeds a plant's ability to use that light efficiently, it can cause photoinhibition and eventually tissue damage. The amount a plant can tolerate depends on several factors, including genetics, growth stage, and environmental conditions.
Daily Light Integral (DLI) measures the total amount of photosynthetically active light a plant receives throughout the day. Excessive DLI can contribute to light stress, particularly when plants receive intense lighting for extended periods. However, DLI alone doesn't determine whether light burn will occur, as PPFD and other growing conditions also matter.
White or bleached bud tops can be a sign of excessive light exposure, especially when the affected flowers are directly beneath powerful grow lights. Intense light can damage pigments and cause localized bleaching.
Yes. Severe light stress can negatively affect flower development and cannabinoid production. Excessive light exposure, particularly when combined with high temperatures, may also contribute to the degradation of certain compounds. However, the effect on potency depends on the severity and duration of the stress.
Recovery time depends on the severity of the damage and the plant's overall health. Mildly stressed plants may show healthier new growth within several days after lighting conditions are corrected. More severely damaged plants may take longer to recover, and bleached or dead tissues generally won't regain their original appearance.
Yes. Light burn and heat stress are two different problems. A cannabis plant can experience bleaching from excessive light intensity even when canopy temperatures remain within an ideal range. Light burn is caused by excessive light intensity, while heat stress is caused by excessively high temperatures.


Comments