
How To Tell When Auto Is Flowering: Week-by-Week Grow


- 1. Intro
- 2. The vegetative stage of your plants plant
- 2. a. Week 1 - week 4: vegetative state
- 3. The pre-flowering stage
- 3. a. Week 5: the appearance of stigmas
- 3. b. How to recognize pre-flowers?
- 3. c. Auto not flowering?
- 4. The flowering stage
- 4. a. Week 6: stigmas in abundance
- 4. b. What are stigmas?
- 4. c. Week 7: development of frosts
- 4. d. What are frosts?
- 4. e. Week 8: calyxes fattening up
- 4. f. What are calyxes?
- 4. g. Week 9: returning time
- 5. How to tell if my auto is ready?
- 6. What to do once you have returned your auto buds
- 6. a. Drying and trimming
- 6. b. Curing your buds
- 7. Expert opinion by jorge cervantes - co-author:
- 8. In conclusion
Preface
Plants cultivation is a topic of growing interest and importance in the agricultural and botanical worlds. Enzo Schillaci and Jorge Cervantes, two well-known experts in the plants industry, co-wrote this article, which offers a thorough guide on identifying the flowering stages of auto plants plants from the vegetative stage to return time. The article covers critical topics such as the signs to look for in each stage, the proper nutrients to provide, and how to recognize pre-flowers and frosts. It also delves into the scientific aspects of plants plants, explaining the functions of stigmas, calyxes, and frosts and how to use these indtors to determine the optimal return time.
The article begins with an introduction to auto plants plants and the differences between photosensitive and auto plants. It then provides a week-by-week guide to the growth stages of auto plants, from the vegetative stage to the pre-flowering and flowering stages, and finally to the returning time. Each stage is detailed, with accompanying images and explanations of the plant's structure and appearance changes. The article also provides practical advice on caring for the plants during each stage, including the appropriate nutrients to provide and techniques to apply.
Enzo Schillaci and Jorge Cervantes are well-known figures in the plants community, with extensive experience in plants cultivation and writing. Enzo Schillaci is a full-time plants writer at Fast Buds auto genetics, originally from Argentina. He has traveled the world, gaining knowledge and experience in plants cultivation, and has been featured on various platforms. On the other hand, Jorge Cervantes has more than 40 years of experience writing books on plants cultivation. He is the author of "The Plants Encyclopedia" - a comprehensive guide to every aspect of plants cultivation.
Intro
If you’re new to growing autos, you may not know how these plants flower. Read along this 2026 week-by-week guide to know exactly what to look for, signs of pre-flowers, when the plants are in full bloom, and what to consider when growing autos.
For those who are new to growing auto Plants plants, you may be unaware of exactly how these plants flower. As you may know, autos start flowering automatically, without the need of changing the light cycle. Despite the minor differences between photos and autos, both will show the same signs when flowering, such as white hairs, frosts, and dense calyxes.
1. The Vegetative Stage of Your Plants Plant
Week 1 - Week 4: Vegetative State
Depending on the specific genetics you’re growing, there will be a vegetative period of around 4-5 weeks. During this time, your plants plants will focus on developing green matter such as roots, branches, foliage, and establishing itself structure-wise prior to flowering. All of these parts of a plant are essential to plants because they’re used in vital processes such as transpiration, which helps plants regulate temperature, and photosynthesis, which is used to produce sugars used for plant growth.
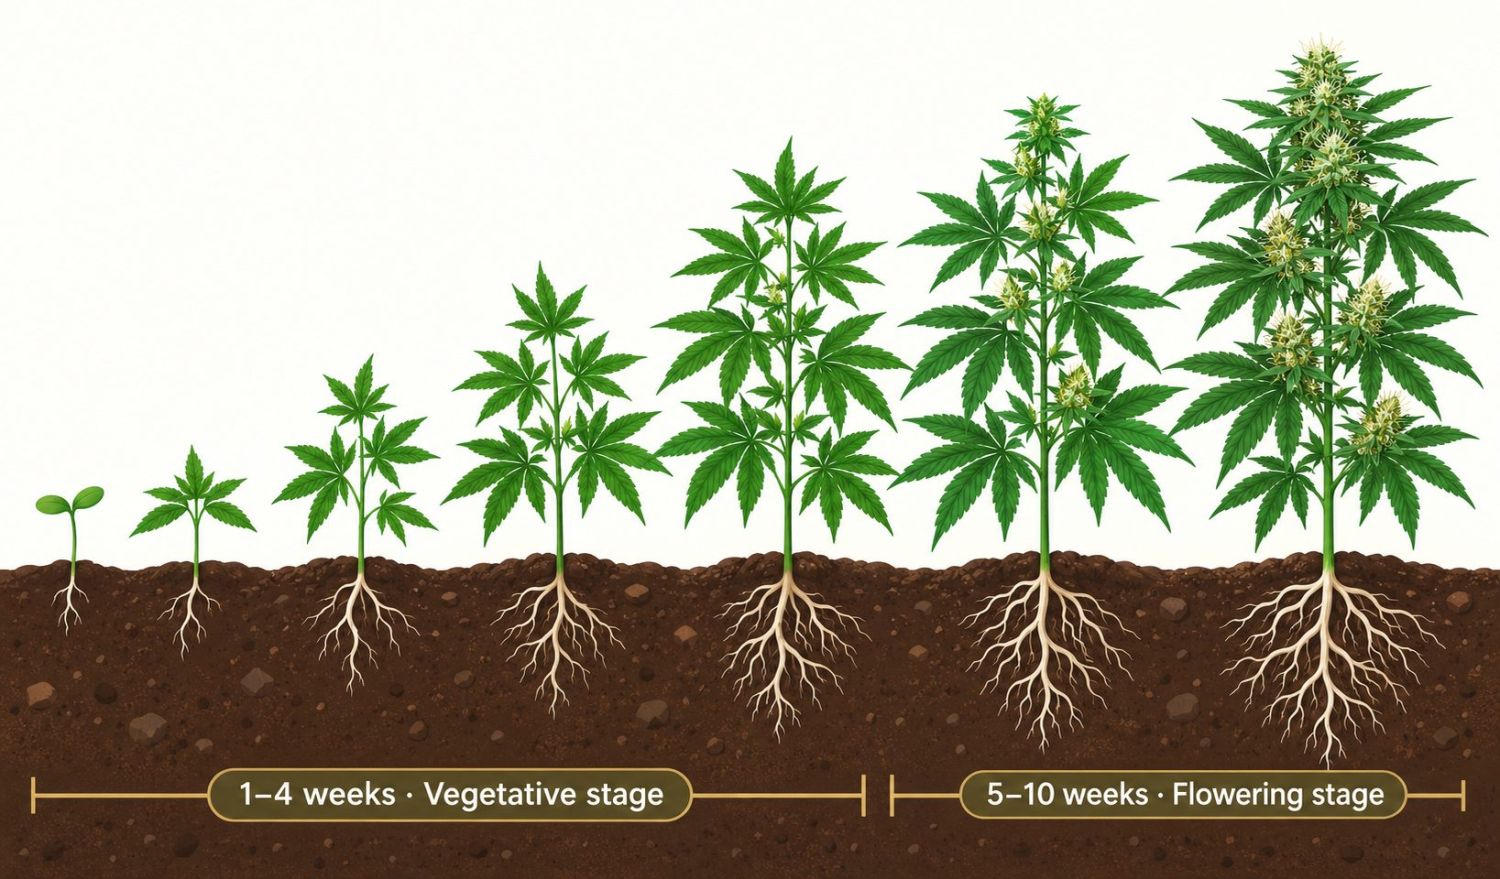
Also, all of this growth is what will allow your plant to withstand the weight of the buds during the flowering stage. As you may know, some plants produce super heavy flowers, and if your plant hasn’t developed properly, you’ll need to provide support or the branches may end up snapping. During this stage, there will be no signs of flowers, and this is also the ideal window to apply plant training to your auto plants.
- Focusing on stems, branches, and foliage development.
- Roots will grow and anchor into the growing medium.
- The ideal time to use techniques such as topping and L.S.T.
- Higher amounts of Nitrogen will be needed during this time.
2. The pre-flowering stage
Week 5: The appearance of stigmas
No matter what time of the year outside you decide to grow your autos, after about the fourth week of growth, the plants will begin to transition into the pre-flowering stage. This means they will shift in auxin production and focus on flowering, causing a hormonal change and a preference for certain nutrients. When your plants start flowering, you have to make sure that you're providing higher doses of phosphorus and potassium. These are the main minerals your plants plants need to produce buds.
Apart from these two, plants plants also need micronutrients. These minerals are needed in much lower doses, and depending on the type of medium you're growing in, you will have to provide them with products such as CalMag additives. Other than Calcium and Magnesium, your plants also need Iron, Sulfur, Copper, and zinc, among others, and even though they are used in small quantities, your plant won't perform as well if they're not available, so make sure they are.
You can measure the amount of minerals present in your water source by using a TDS meter, but you won't know exactly what's in it, so the only way to know exactly what's present is to filter your water and add the minerals to the desired quantity. It is from this point onwards that the plants will continue to fully bloom until the return date.
- Auto plants will stop focusing on root development.
- The plants will go through a hormonal growth spurt, causing them to stretch.
- Pre-flowers will appear in abundance very quickly after 4 weeks.
- Avoid training your plants at this point, especially topping.
- Plants will be more dependent on higher amounts of P-K now until return.
How To Recognize Pre-Flowers?
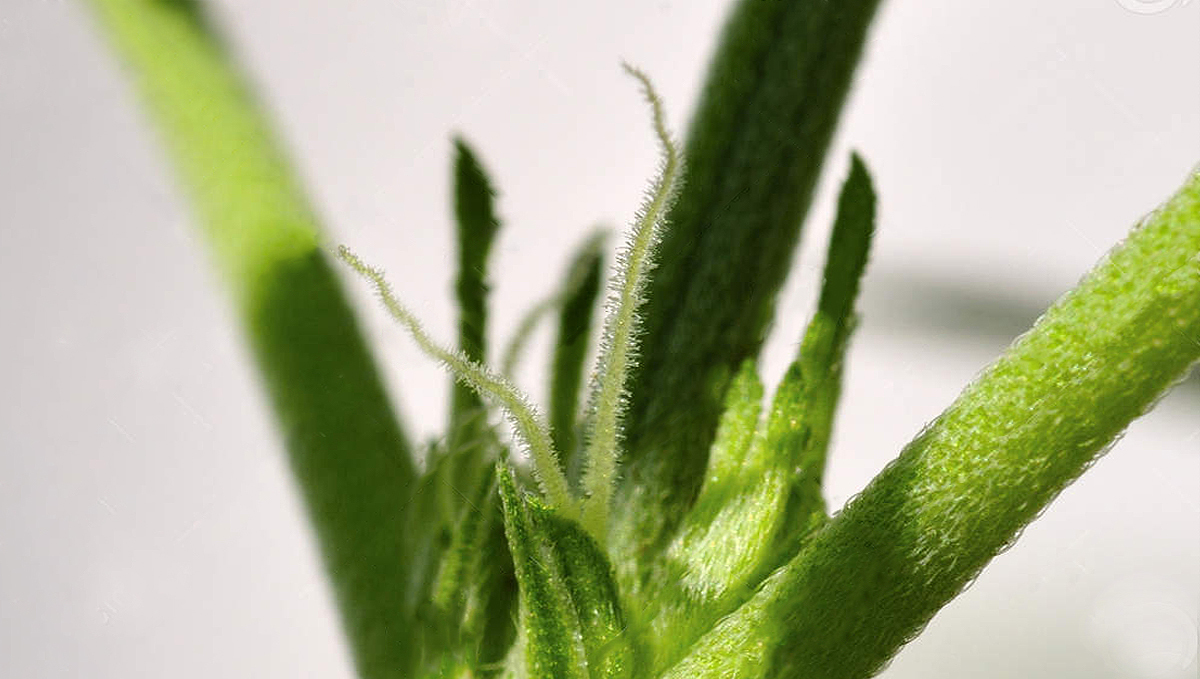
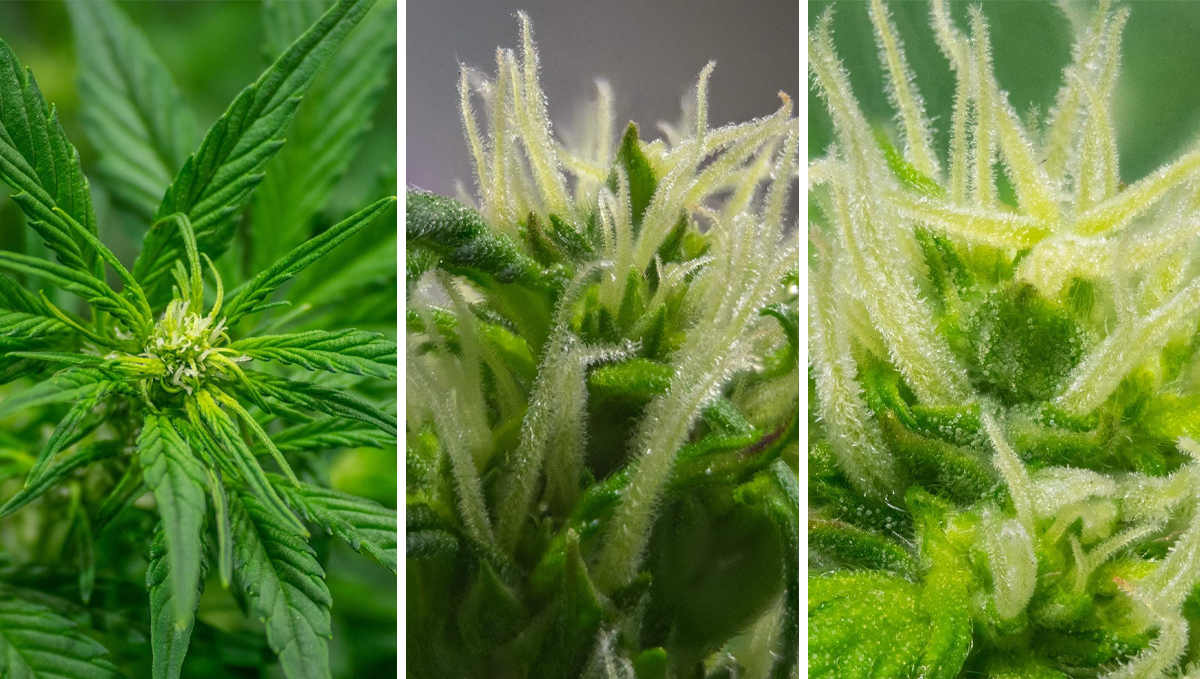
From the start of the pre-flowering stage until the end of your plant’s life cycle, you’ll see an abundance of white hairs growing all over. These white hairs (stigmas) are a sign of a female plants plant. These long hairs emerge from the calyxes and are responsible for capturing pollen to produce seeds, but usually, home growers don’t make seeds, so these hairs won’t wilt and brown until the last couple of weeks of the flowering stage.
Auto Not Flowering?
As you may know by now, after 3-5 weeks your auto should be transitioning to the flowering stage, but if the weeks go by and you don't see any signs of stigmas (white hairs), there are a couple of things that could be causing this. First of all, remember that the information most breeders specify is when growing their genetics in optimal conditions, so if you don't have a good light fixture, nutrients, and are not controlling the conditions, your plants may take a bit longer. But don't worry, they will flower.
Another factor that could have an influence is the phenotype you get. This happens because autos are hybs, which means they contain a mix of genetics, and the percentage of Ind, Sat, and Ruderalis in each specific cultivar may vary, so even if you are growing a seed that the breeder specifies takes around 10 weeks, your plants could take a bit less (8-9 weeks) or a bit longer (11-12 weeks), depending on the phenotype and conditions provided.
3. The flowering stage
After your plant has already started showing signs of flowers, you’re officially in the flowering stage. But before the plant is officially in the flowering stage, it will go through a transition period called “pre-flower,” which is when the plant goes through the “pre-flower stretch”. After this spurt of growth, there will be no more vertical growth as the plant focuses on bud development from now on.
Week 6: Stigmas in abundance
The sixth week into flowering is when you’ll see your buds really starting to develop. At this stage, your plant will start producing a lot of hairs, and you’ll see your plant full-on flowering.
As shown, the white hairs start super long and almost clear, and closer to return, they will brown and wilt, also looking shorter. This is because the calyxes, which is where stigmas grow out from, are getting bigger and denser.
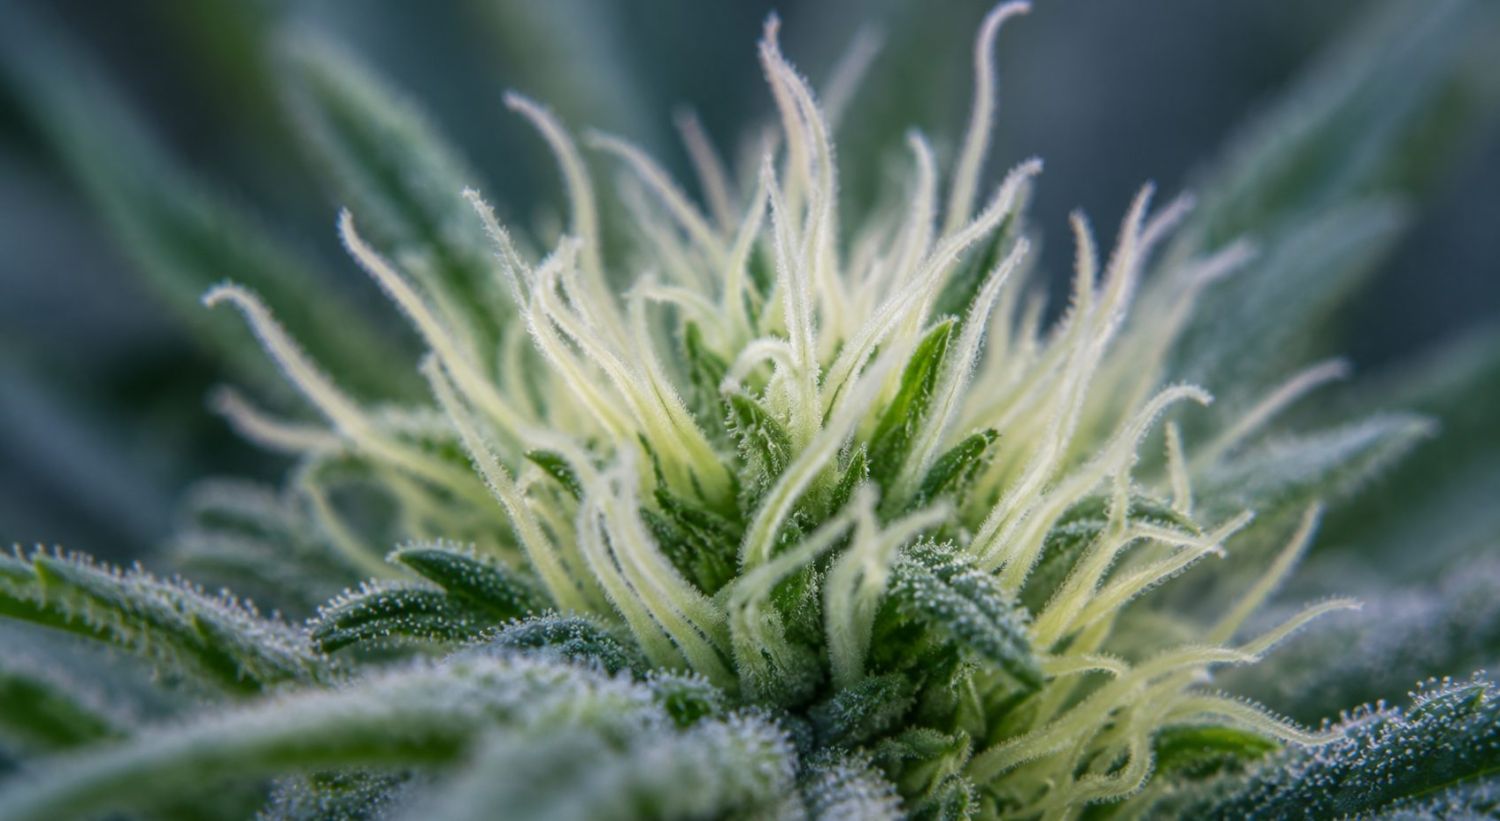
You will see a lot of hairs all over the flowering sites. These hairs are a sign that your plant is sexually mature and can now produce buds or seeds if it gets pollinated. You’ll also see the frosts starting to appear with the stigmas. Even though you won’t see a lot of ok right now because your plants have just started producing it, you will definitely be able to smell that sweet plants aroma.
What Are Stigmas?
Pre-flowers are the first signs of a female plant, and the stigmas will start to appear, looking like small white, fuzzy hairs. This is actually what ends up as the brown hair wrapped around your dried buds, and is the start of life for bud production.
Stigmas can be found on the flowering sites, and as the plant develops, starting from the pre-flowering stage and onwards, the entire plant will become filled with thousands of long white hairs. The name of the white hair is the stigma, and it will emerge from the calyxes. As the female sex organ, it is the stigma that must come into direct contact with the pollen to produce seeds.
Week 7: Development of frosts
In the seventh week of flowering, you will probably see an abundance of ok all over the buds and surrounding foliage. This is when you’ll need a carbon filter or any other way to mask the strong plants aroma. In the image below, you can clearly see a bit of ok starting to form, although it is not as abundant as when the buds are ready for return. This is a sign that your plant has just transitioned from the vegetative stage to the flowering stage and will gradually start to fatten up the buds and produce a lot of ok.
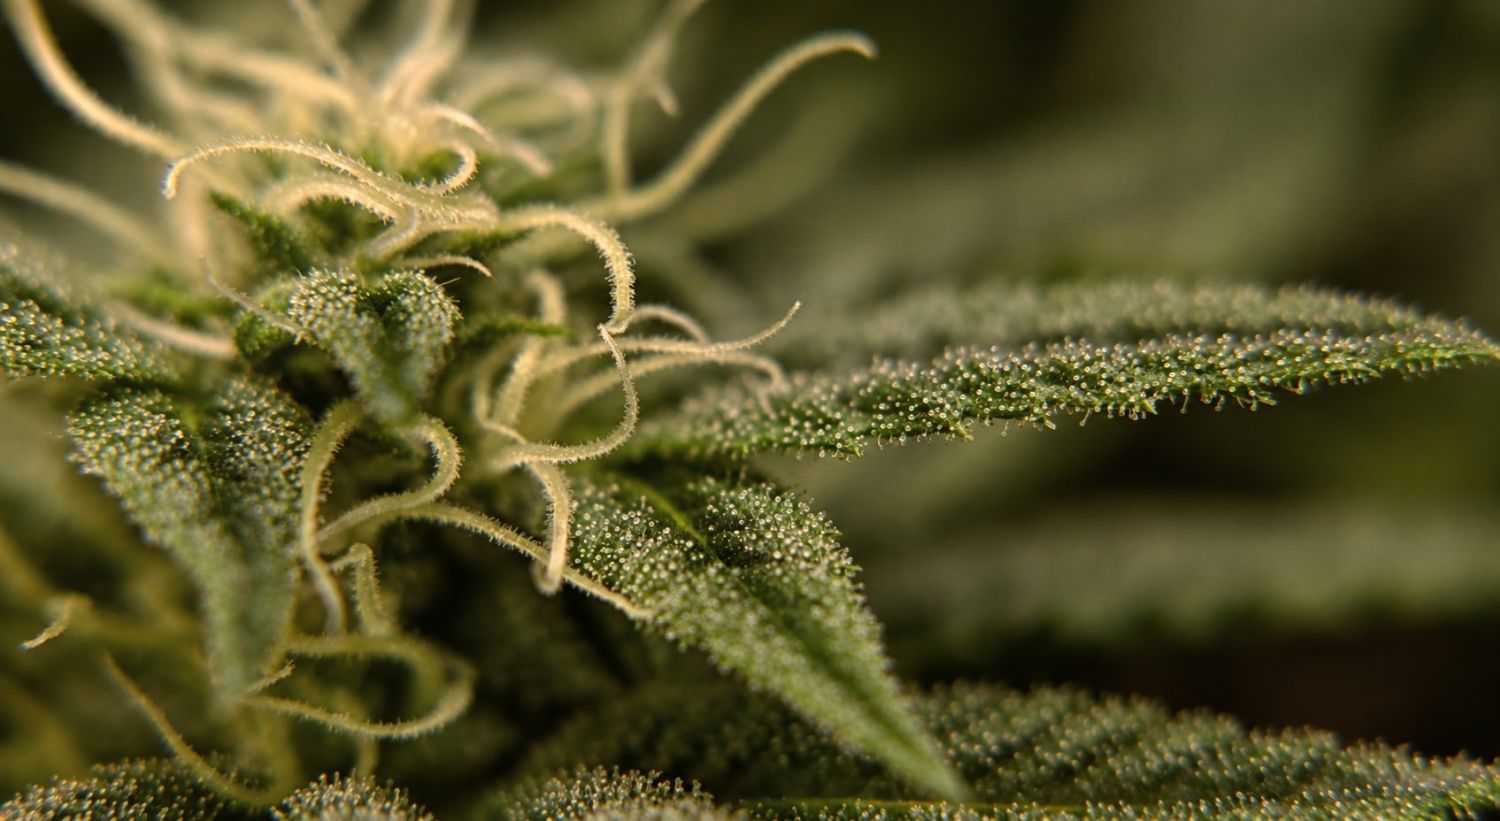
The frosts produce and store all the sweet compounds you love so it’s essential you provide good conditions because the frosts are volatile and can be degraded by physical contact, excessive heat, oxygen, and light. Remember that frosts produce and store the flavor, which are responsible for the smell. In most cases, when plants plants start producing frosts, they will start smelling really strong, so depending on where you’re growing and the setup, now it’s a good time to deal with it.
What are frosts?
Frosts form the ok you can clearly see on the buds and surrounding plant material. The frost glands produce and store flavonoids, flavor, and strength, which are the compounds responsible for the effect, aroma, and flavor you’ll get when smoking your plants buds.
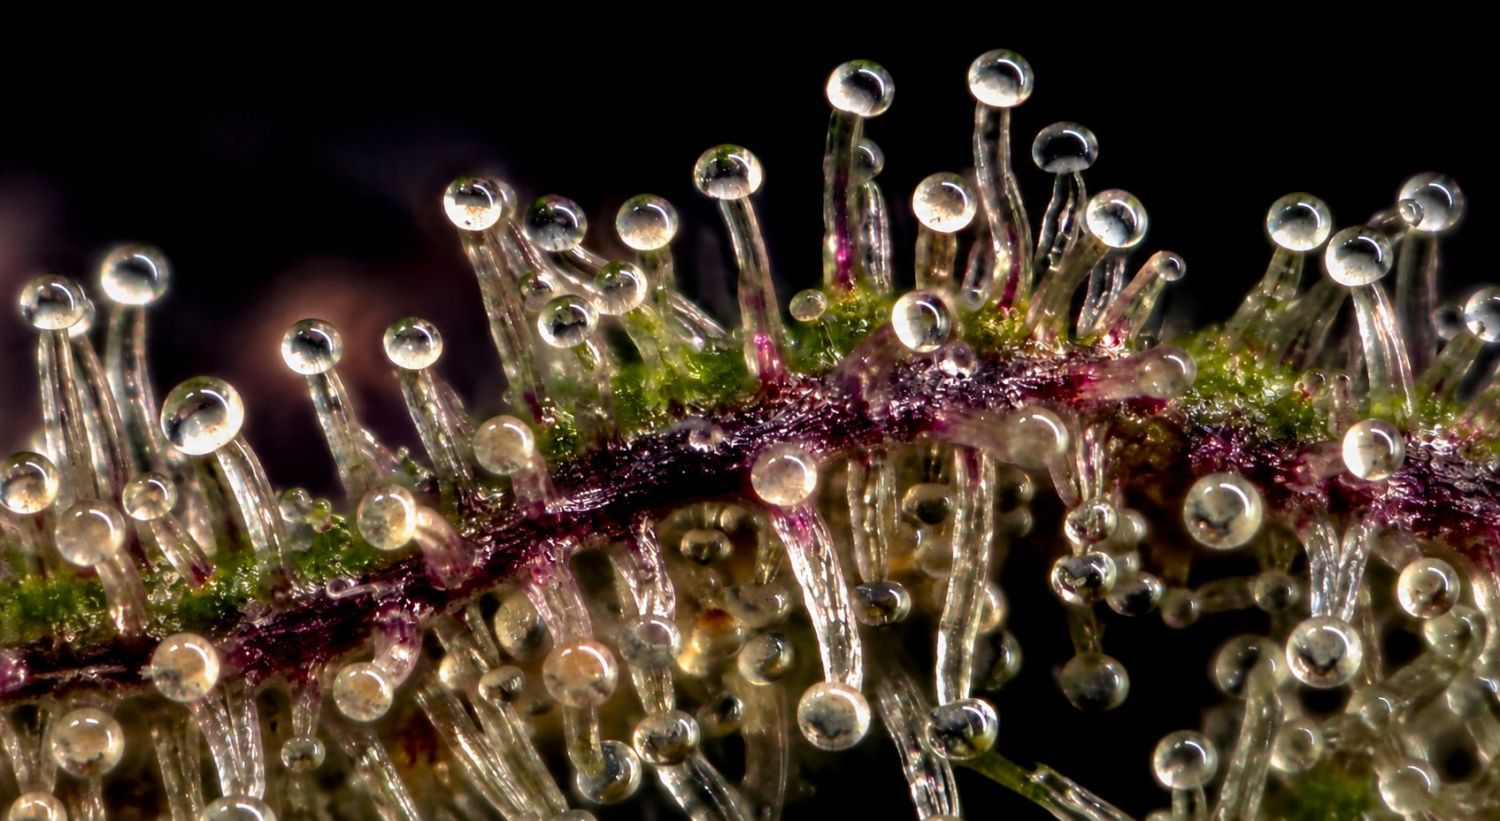
The frosts are also responsible for protecting the buds against UV rays and bugs, so if you see frosts on your plant, it means the buds have already started developing or are right about to start. Let's dig a little deeper into exactly what frosts are, and the different stages they go through as they develop.
What Are Frosts Made of, And What is Their Primary Function?
The etymology of the word frost comes from the Greek word for hair growth - trichōma - with the current definition being "delicate appendages on plants". They are found throughout the plant world (as well as on algae and lichen) and come in a wide range of shapes and sizes. These growths usually come in the form of minuscule, mushroom-shaped appendages and can be made of hairs, glands, scales, and papillae. For most plants, the primary function of frosts is the first line of defense against insects, pests, pathogens, and environmental stressors. This is done by the production of chemical compounds or through the physical structure of the frost itself, causing irritation.
The sting you receive when you brush up against a stinging nettle is caused by - you guessed it - the trusty old frost. They can also perform a range of other functions, like leaf temperature regulation and boosting photosynthesis. There are even some plants that employ the use of frosts in an offensive manner. Such as the Venus flytrap, where the frosts help the plant "grab hold" of the prey. Plants frosts are purely defensive. They help with warding off any pests by releasing a sour, bitter flavor, and also help with protecting the plant against harmful UV rays and strong winds. They can even help with reducing the likelihood of fungal growth appearing. In terms of plants frosts, there are a couple of different types that all go through a few stages of development.
Bulbous Frosts
The smallest of the three types of glandular frosts found on plants plants, and the only type that contains zero traces of strength, although they do produce low levels of flavor. Measuring 15 - 30 micrometers, they are invisible to the naked eye and consist of only a few cells.
Capitate-Sessile Frosts
Capitate-sessile frosts are the mid-sized frosts produced by plants plants and are the most plentiful. Tipping the scales at 25-100 micrometers, these can be viewed without a microscope, but only just and not always. They are found on the stems and leaves (but not the sugar leaves), and while they do contain strength and flavor, they are much less potent than the third and final type of frosts that plants plants produce.
Capitate-Stalked Frosts
Capitate-stalked frosts are the largest and most important out of the three (for cultivators, anyway). Measuring a whopping 50-100 micrometers, this is the type of frost we all think of when we hear the word. Covering the buds and sugar leaves (hopefully), this is where the majority of the strength and flavor are produced. They comprise a stalk and gland head, which holds all of that stick goodness we are trying to maximize.
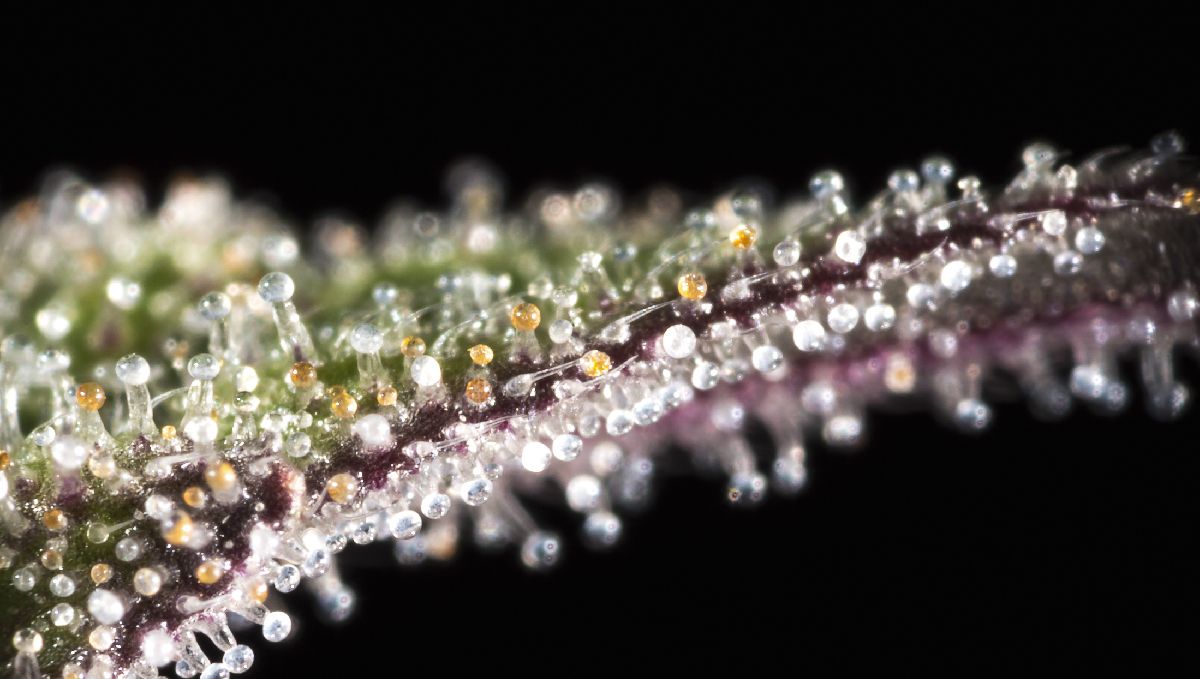
Frost production begins when the plants enter the flowering stage of growth. As the calyxes begin to form, frosts begin to cover the outer layer of the flowering head. Once the gland head has developed, compounds known as vacuoles and plastids are transported up the stalk, where they begin to produce strength. The potency and abundance of strength are affected by both the plant genetics and the environment it's grown in. The number of frosts does not directly relate to the level of strength present, so you could have a bud that is absolutely dripping in ok that is actually of lower quality than a lightly dusted nug - the only way to really know is through lab testing. In general, crops grown under a wide spectrum of light will produce the highest potency, but again it really comes down to the genetics of the cultivar.
The lifecycle of a frost runs in parallel to the lifecycle of the plant that produced it. Understanding this lifecycle is extremely important for plants cultivators, as it remains the gold standard way of timing the final chop. It's important to also understand that frosts are volatile, and the point between peak maturation and the beginning of cannabinoid degradation is a small window. This is also seed-specific, which is one of the reasons why many growers, especially large-scale cultivators, like to focus on a small number of seeds and really get a deep understanding of each. Frosts go through three distinct stages in their lifecycle:
Clear Frosts
This is the first stage of frost maturation, and when the plant is still producing peak levels of both strength and flavor. This is the stage where the frost head is slowly filling with all the stuff that we want, so it's not recommended to return your crop while most of the frosts are translucent, or clear. Crops returned with a larger percentage of clear frosts will offer a more Sat-like effect.
Cloudy Frosts
Sometimes also referred to as "milky", this is the point when potency has reached its peak for both strength and flavor. Some cultivators like to return their crop when the majority of frosts are at this stage (say 90% cloudy), but again, this is seed-dependent.
Amber Frosts
When frosts turn amber, it is an indtion that some of the strength have started the degradation process. It is at this stage that the frosts will offer a more classic Ind effect, with some growers preferring to let a good percentage of the frosts mature to the amber stage to enhance this heavy high.
So, when is the recommended time to return based on the state of the frosts? The go-to rule of thumb is to return when there is an 80/20 split between cloudy and amber frosts. But keep in mind, you may want to return at a slightly different time depending on the seed and the effect you are looking for. If you prefer a Sat, cerebral high, then you should return a little earlier. If you prefer the more couch-lock style effect, then you can wait until there is a 50/50 split between cloudy and amber frosts.
Week 8: Calyxes fattening up
Week 8 into flowering is the week before the last. Your buds will be relatively denser and will give you an idea of how they will turn out after returning. Another good way to know if your plant is flowering is when the calyxes become plump. As you can see in the image below, even though the plant still needs a couple of days, the calyxes are super fat and round, meaning this plant won’t fatten a lot more but isn’t completely mature yet.
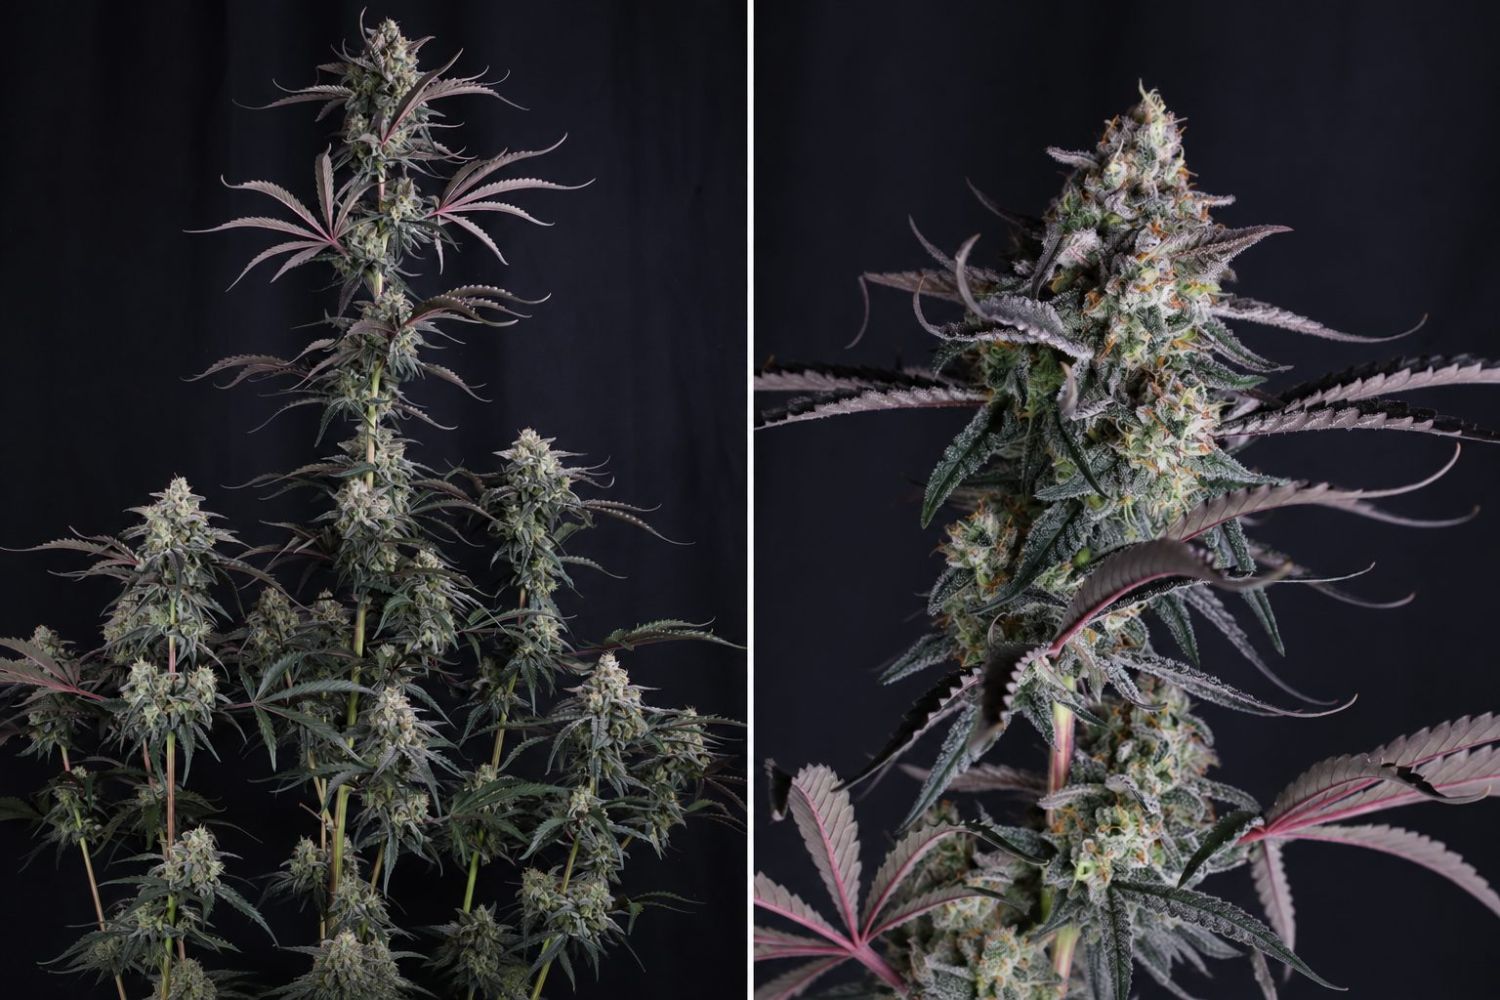
When the calyxes have become plump and are visibly dense, it means your plant is almost ready to be returned. It just needs a bit longer to ripen, and you’ll be all set. This happens because the calyxes are what protect the seeds, which is how plants plants guarantee their next generation. So if a plant has not been pollinated and the calyxes are round and plump, it means the reproduction phase has ended, and your plants are ready to finish their life cycle.
What are calyxes?
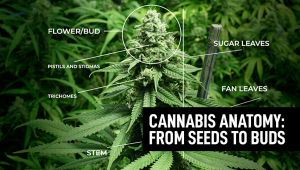
The calyxes are the first part that is formed when a plants plant enters the flowering stage. This structure is designed to protect the plant’s reproductive organs and is where the stigmas come out.
Even though both male and female plants have calyxes, only the female plants are what matter to most home growers because the calyxes are what form the flowers you’ll end up smoking.
Week 9: Returning time
In the last week of flowering, you’ll see the stigmas wilting and browning. When this happens, it’s a sign that the buds are ripening, and it will only take a couple of days to be chopped down. As you can see with the Gorilla Cookies Auto plants in the video below.
When your plants have completely matured and the stigmas have turned brown, your plant won’t take more than a couple of days to be completely mature. At this stage, you’re just waiting on the state of the frosts to return your buds at the right time.
3. How to tell if my auto is ready?
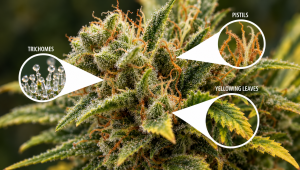
The pistils, frosts, and calyxes are signs that the plants are close to return and the frost development is fully or almost fully mature. Now, just because the hairs have turned brown does not mean you should grab your trimming scissors and eagerly get to work. However, there are a few other things you should check:
1. The stigmas have completely turned brown and wilted; this means your plants have already gone through the reproduction stage and are nearing the end of their life cycle.
2. The calyx has fully bulged, becoming as swollen as possible, giving the buds a compact appearance. It is better to wait for the buds to be as fat as they can be before returning, even if all the hairs are and the frosts are fully mature.
3. Use a high-powered lens and examine the state of your frosts. You will notice the head of the frost will be either clear, milky, silver, or amber-colored. Returning your auto plants when the frosts are milky to amber will provide better effects.
| Best time to return based on the frosts | |
|---|---|
| State of the frosts | Effect |
| Clear | Still unripe, not too potent. |
| Cloudy | At their peak potency. |
| Amber | strength degraded into CBN, more corporal effect. |
Remember that you don't need to follow this table, but it may be helpful. By knowing exactly what effect each state of the frosts provides, you can fine-tune your return when your plants will provide the desired effect. So, for example, if you don't want a super-strong head rush, you can return when 70/30 or even 50/50 of the frosts are amber and cloudy, resulting in a more balanced effect.
5. What to Do Once You Have Returned Your Auto Buds
Ok, so you have gone through the painstaking process of growing your auto crop. You have made it all the way through and returned the flowers at the perfect time (when the frosts are displaying a 50/50 ratio of cloudy and amber).
This means it’s time to smoke up, right? Wrong!
Honestly, you have only won half the war! Seems crazy, right? Depending on the style of cultivation, you may have had months of hard toil to get to this point, but there are still some key processes to be followed if you really want to get the best out of the return and all the hard work you have put into it. Although cannabinoid and flavorene production has ended, the maturation of both is anywhere but over.
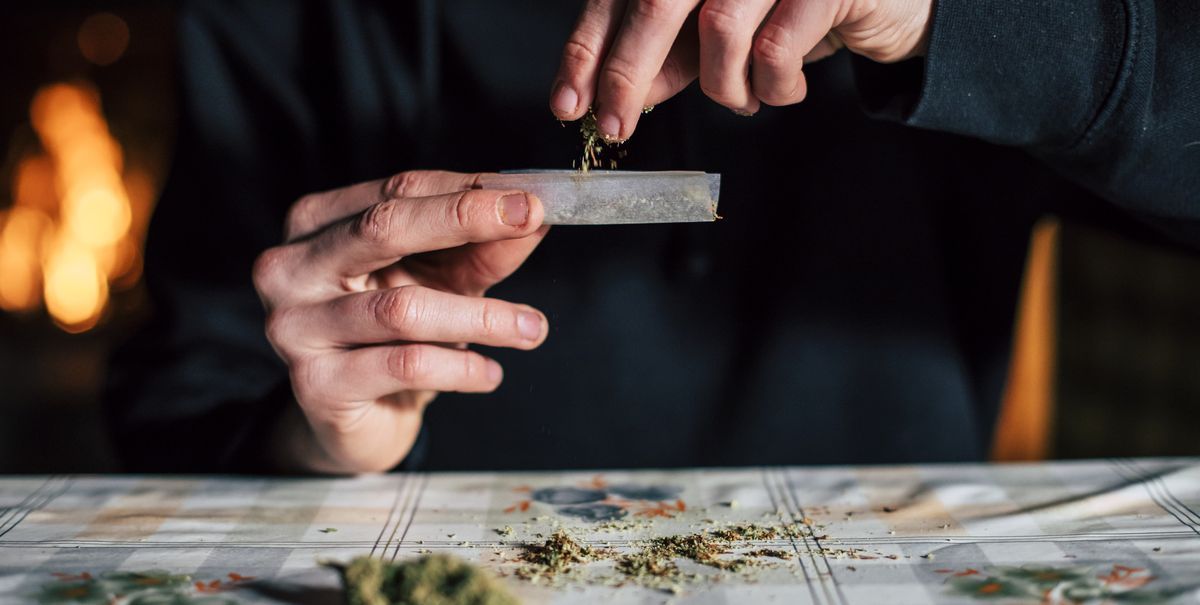
Sure, you could throw the oven on the lowest setting and put some of the buds in to quickly dry them off. And we would be straight-up liars if we said we hadn’t committed said crime in our past. But if you have something else on hand to smoke and are not totally desperate, then wait on! Let’s have a quick chat about how you should go about drying, trimming, and curing those hard-earned buds.
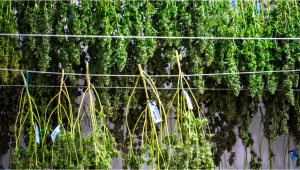
Drying and Trimming
The first decision you have to make is whether to dry or wet trim the return. In almost all circumstances, we recommend dry trimming. Only wet trim if you live in a particularly hot and humid climate, and you are unable to control the environment in the dry room. Any trimming is a laborious and sticky job, but wet trimming is much messier and can affect the overall quality of the smoke in a harmful way, so if you can, dry the plants first, then trim it. You want the buds to dry slowly over a period of 8 to 14 days. To achieve this, it is very important to have environmental control over any drying room or area. You want the ambient temps to be at 60 - 70 F (15 to 22 C), and the relative humidity must be between 55-65%.
You also need to make sure that the drying area is as dark as possible. Sunlight is a cannabinoid and flavorene killer, so keep them in pure darkness if you can. You may have hit the drying lottery and live in the perfect climatic conditions, but for most of us, that is just not the case. If that is not the case, then you are most likely going to need some pieces of kit to help you keep the temps and humidity in the right range. You should already own at least one hygrometer (that’s a temp and humidity gauge). Grab that and check where the levels are at. If the ranges are incorrect, you may need to grab a humidifier (or dehumidifier), an AC unit, some fans, or a heater. Use whatever is needed to keep the temps and humidity within the required ranges. Just remember to never have any of the fans, the AC unit, or the heater pointed directly at the drying buds, as this can have a hugely negative effect on the overall quality.
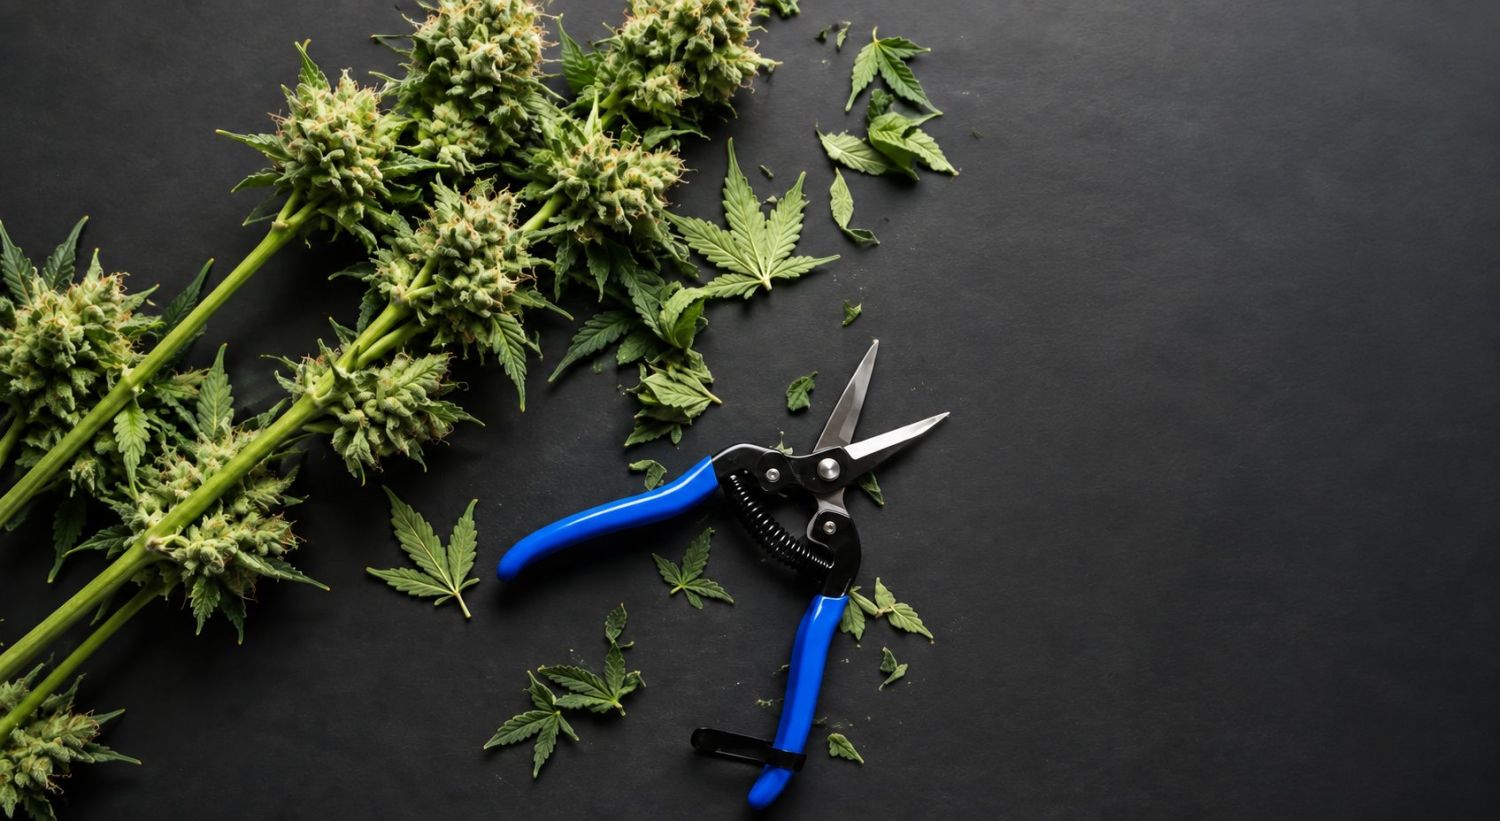
Once the buds are nicely dried, it’s time to trim. Grab some good trimming scissors off Amazon or from your local hydro store (do not use household scissors unless you want max pain) and a trim tray. These two pieces of kit will make your trimming experience much more enjoyable.
Curing Your Buds
Now it’s time to smoke, right? Ummm, well, kind of….For sure, at this point, the buds are in a good condition to smoke. But if you want to get the best out of your crop, you have to let it cure! Think of curing like aging for wine or whiskey. Depending on the seed, it can take anywhere between 2 weeks to 6 months for the flavorene profile to fully mature - but in most cases, a curing time of one month will be perfect. Go out and grab some resealable mason jars (or any airtight container, really). Place the buds inside without overfilling the jars; 75% full is perfect. The flowers need the space to breathe here.
If you have a small hygrometer, you can place it in the jar. There is no need to burp the jars as long as the humidity stays in the 58-62% range. However, if you don't have a small hygrometer, this is what you should do:
For the first 10 days, you are going to want to burp the jars twice a day. Don’t worry if your buds seem a little moister to begin with. This is to be expected as the internal moisture leaks out to the exterior bud layer. After the first 10 days, the jars only need to be burped twice a week or so. After a month, you should have some of the highest quality plants you have ever seen, as curing is an overlooked part of the process - especially for commercial growers.
EXPERT OPINION BY JORGE CERVANTES - CO-AUTHOR:
Understanding the scientific principles and fundamentals of plants cultivation is essential for preventing potential issues and achieving a successful return. This article provides valuable insights into the growth stages of auto plants plants, explaining the key indtors to look for and the appropriate care to provide at each stage. It is essential to understand the functions of stigmas, calyxes, and frosts, as these are essential indtors of the plant's health and maturity. Providing the proper nutrients at the right time is crucial for the plant's development and return quality.
Promoting organic growing practices, sustainable and responsible cultivation, and sharing knowledge are fundamental principles I have advocated for in my 40+ years of writing about plants cultivation. It is essential to adopt these practices to ensure the long-term success and viability of the plants industry. My extensive body of work aims to empower the next generation of plants growers, advocate for plants legalization and education, and contribute to the enduring legacy of the plants community.
As the plants industry continues to evolve, it is essential to heed the guidance of experts and adopt sustainable and responsible cultivation practices. This article provides valuable insights and practical advice for growers of auto plants plants, contributing to the knowledge base and fostering a community of informed and responsible growers.
6. In Conclusion
It is very important when growing auto cultivars to know what to look for, as well as what to feed them. Once you have achieved the perfect balance in the feeding department. Getting familiar with different cultivars can take time and experience. The diversity of auto Plants is at its pinnacle, with so many hybs with a wide variety of different traits.
Good luck growing your autos this year, and we hope this article will help you on your way to growing some incredible crops!
External References:
- TRICHOMES OF CANNABIS SATIVA L. (CANNABACEAE) - Dayanandan, P. & Kaufman, Peter. (1976).
- Pollen-Pistil Interaction and Fertilization. - Shivanna, K. (2020).
FAQ
An auto is beginning to flower when small, white, hair-like pistils (stigmas) appear at the nodes where branches meet the main stem. You may also notice faster vertical growth and the formation of early bud sites.
Most autos begin flowering around weeks 3–5 after germination. The exact timing depends on the seed, growing conditions, plant health, and genetics.
In the final weeks, buds continue swelling and ripening. Many pistils (stigma) darken and curl inward, while frosts gradually change from clear to cloudy and, eventually, amber.
Yes. Autos flower according to age rather than changes in the light schedule. Stress, restricted roots, poor conditions, or naturally compact genetics can result in a small plant beginning to flower. However, the main reason for early flowering is overfeeding.
No. Unlike photoperiod plants, autos do not require a switch to a 12/12 light schedule. They begin flowering automatically under 18/6 from start to finish.
Late flowering may be caused by slower genetics, environmental stress, poor plant health, or incorrect labeling. If the plant is healthy, giving it additional time is often the best approach.
A noticeable aroma often develops around pre-flower but gets stronger around weeks two to four of flowering.
Pistils may turn brown because of natural maturation, physical contact, heat, low humidity, pollination, or environmental stress. A few brown pistils are not necessarily a problem, especially if new white pistils continue appearing.
Some yellowing or fading of older fan leaves can be normal as an auto approaches maturity and uses stored nutrients. Rapid or widespread yellowing early in flowering, however, may indte stress, nutrient imbalance, or an unsuitable root-zone pH.
Use the breeder’s timeline as an estimate rather than a fixed deadline. Genetics, light, temperature, plant health, and other growing conditions can affect development, so the plant’s visible signs are more important than its age alone.
Comments