
When is the Best Time to Return Auto Plants?


- 1. How to know if my auto is ready for return?
- 2. Returning based on the seasons
- 3. The vegetative stage: week 1-5
- 4. Ripening of the buds
- 5. Flushing
- 6. The return window
- 7. Approximate breeder’s schedule
- 8. When you notice less water usage
- 9. Yellowing and dying fan leaves
- 10. Bracts (calyxes) become plump
- 11. Color of the stigmas
- 12. Maturity of the frosts
- 13. Early return vs late return
- 13. a. Early return
- 13. b. Late return
- 14. How to return, dry, trim, and cure your plants crop perfectly
- 15. In conclusion
The best time to return your plants depends on a few different variables. Every plant is different, and the only way to be sure and compare all of these variables, such as the maturity of frosts, water usage, and swelling of the bracts.
Once you develop the eyes to see, you’ll realize your plants plants send out a host of visual cues to signal the best time to start chopping stems and branches. These signs range from large structures such as leaves shifting color to the changing aesthetics of tiny components of plants anatomy. However, you need to know what to look at and what to look for to make this judgment. Below, you’ll discover the key signs to seek to determine a timely return from your auto plants plants.
Once your autos look almost ready for return, there’s a “return window”. This is the time when your plants start ripening, and you have to decide when to return plants. So read along to learn more on how to get a good plants return in 2026.
1. How to know if my auto is ready for return?
It really doesn’t matter if you’re growing indoors or outdoors. The time will come, and you’ll have to return plants plants. Now, the act of cutting a plant down isn’t hard at all, but if you’re a first-time grower, it can be hard to know exactly when to do it for the best possible outcome.
| Auto | Photo | |
|---|---|---|
| Sat | 10 weeks | up to 16 weeks |
| Ind | 8 weeks | 12 weeks |
The best time to return plants depends on a combination of different factors. It can take a little bit longer if you want to properly flush your plants or if you are dealing with seeds known for taking longer to mature and ripen.
Either way, the best time to return plants (once your plant is in the “return window”) will depend on your personal preference.
2. Returning based on the seasons
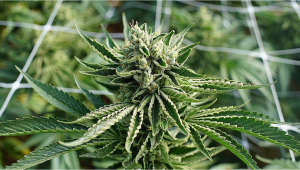
Planning your return by the seasons depends on the place you live in and knowing the expected weather. For example, during summer you can get up to 15 hours of sunlight, but when autumn comes, the amount of sunlight decreases drastically. Although this won’t make your autos flower because they don’t depend on a light cycle to start flowering, it can affect returns.
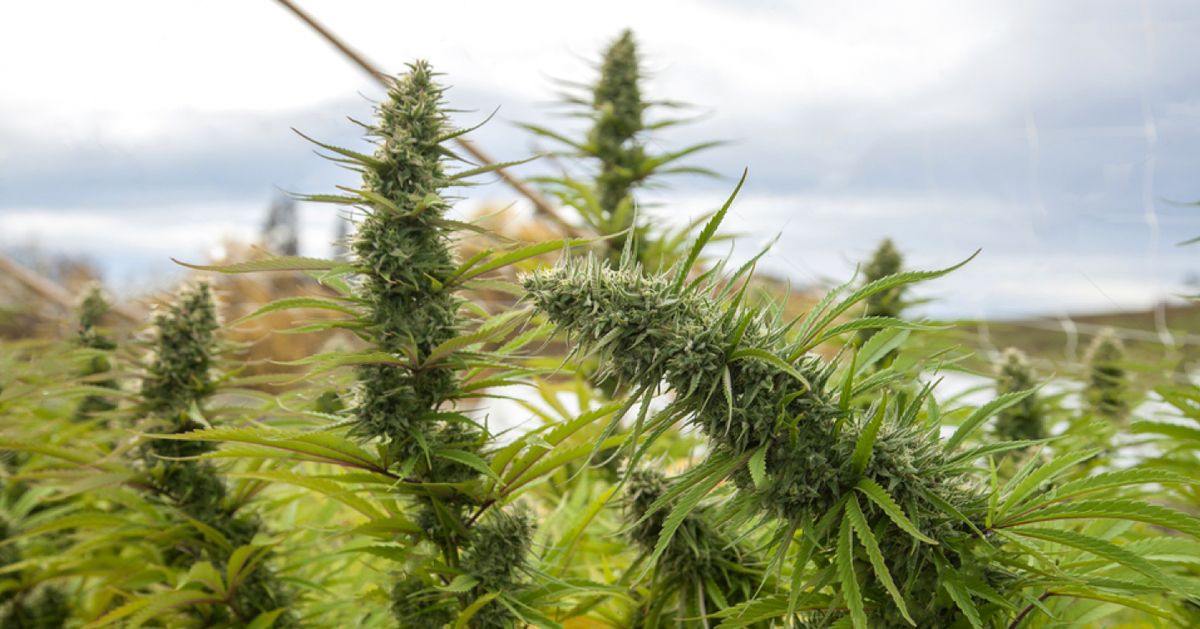
The best way to prevent this is to make a grow calendar before germinating your seeds. Some places can get as little as 9:30 hours of sunlight during winter, so by planning, you can get better overall results. This will not only allow for better returns but also less risk of unexpected problems throughout the grow cycle.

3. The Vegetative stage: Week 1-5
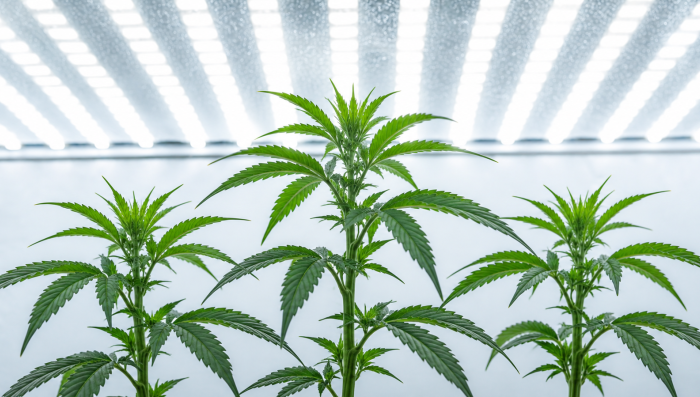
Before starting to look for the signs that indte your plant is completely mature, she has to go through the whole vegetative stage, which starts as soon as your plant starts performing photosynthesis, starting from week 1 all the way to week 5 with auto seeds. In the vegetative stage (aka growing phase), your plants will only develop their structure, and even though they're not producing buds, it's super important because it's the period your plant has to grow the leaves, which are used in photosynthesis, and develop the branches and stem, which are the parts of the plant that support the buds.
Without a proper growing phase, the branches can snap if the buds fatten up too much, or if your plant doesn't grow too much, the returns will be affected. Achieving optimal plant health during the vegetative phase will pay big dividends when return time swings around. Plants plants spend this period packing on size and developing large fan leaves that act as biological solar panels to convert light into sugars. Interestingly, plants only use some of this energy themselves. They send the rest out into the rhizosphere—the small slither of soil around the roots.
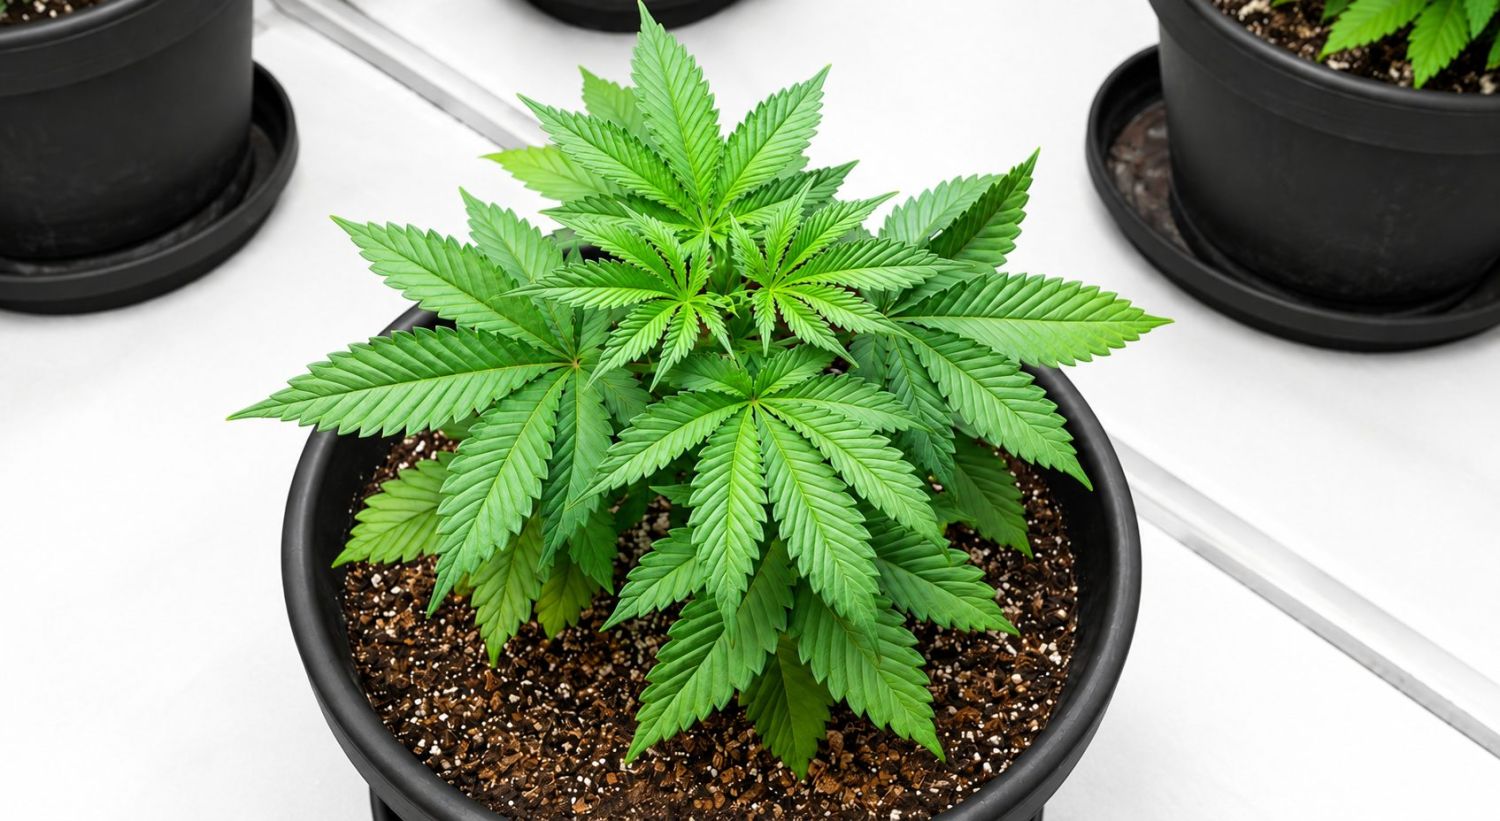
Here, these sugary exudates attract all kinds of microbes, including symbiotic bacteria and fungi that help with nutrient uptake and pathogen resistance. Early research shows that a healthy microbial community in the soil might even contribute to increased cannabinoid production (think strength and Extract) in the flowering phase—highlighting the importance of organic growing methods. Overall, the vegetative phase serves to develop plant structure and future bud sites, as well as disease resistance and nutrient cycling in the soil; it lays the groundwork for the flowering phase to come.
By maintaining a good growing environment, you ensure your plant is happy and healthy, and that is the best way to guarantee a good return.
4. Ripening of the buds
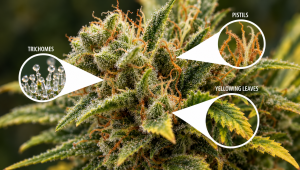
Before you are in the “return window”, your auto plant needs to develop and begin ripening the flowers. This starts when your plant enters the pre-flowering stage (around week 5) and can take up to 5 weeks (depending on the seed). It’s during this time that a basic knowledge of plants anatomy comes in really helpful. There are two key components of plants buds that you’re going to start tracking for the rest of the flowering phase: Frosts and stigmas (pistils). Let’s start with the frosts. These tiny mushroom-shaped glands are responsible for the frosty layer that coats plants flowers; they also churn out the viscous ok that makes buds sticky.
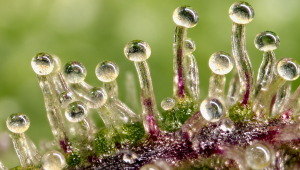
Three major forms of frosts occupy plants flowers and, to a lesser extent, the leaves: Bulbous, capitate-sessile, and capitate-stalked. Of these three, the capitate-stalked frosts produce the highest concentration of valuable secondary metabolites in the form of strength such as strength and Extract and flavor including pinene, limonene, beta-caryophyllene, and myrcene. Further down the page, you’ll find out how their appearance indtes the ripeness of plants flowers.
Pistils comprise the second part of plants anatomy that you need to know about when it comes to determining plants flower maturity. Pistils are essentially the reproductive organs of female plants plants and feature several important components. At their base, they possess an ovule-shaped piece of plant tissue known as a bract, from which hair-like structures known as stigmas protrude. The stigmas play an important role in plants breeding, as they force flowers to start going to seed upon contact with male plants pollen. However, they also come in handy when looking to return buds. Just like the frosts, they also change in appearance to indte ripeness (more on that later on).
Week 6
Around week 5, your auto is entering the pre-flowering stage, and you will see stigmas (white hairs) starting to come out from the pistils. The pistils contain the ovule, style, and stigmas and are responsible for producing the seeds when they get pollinated.
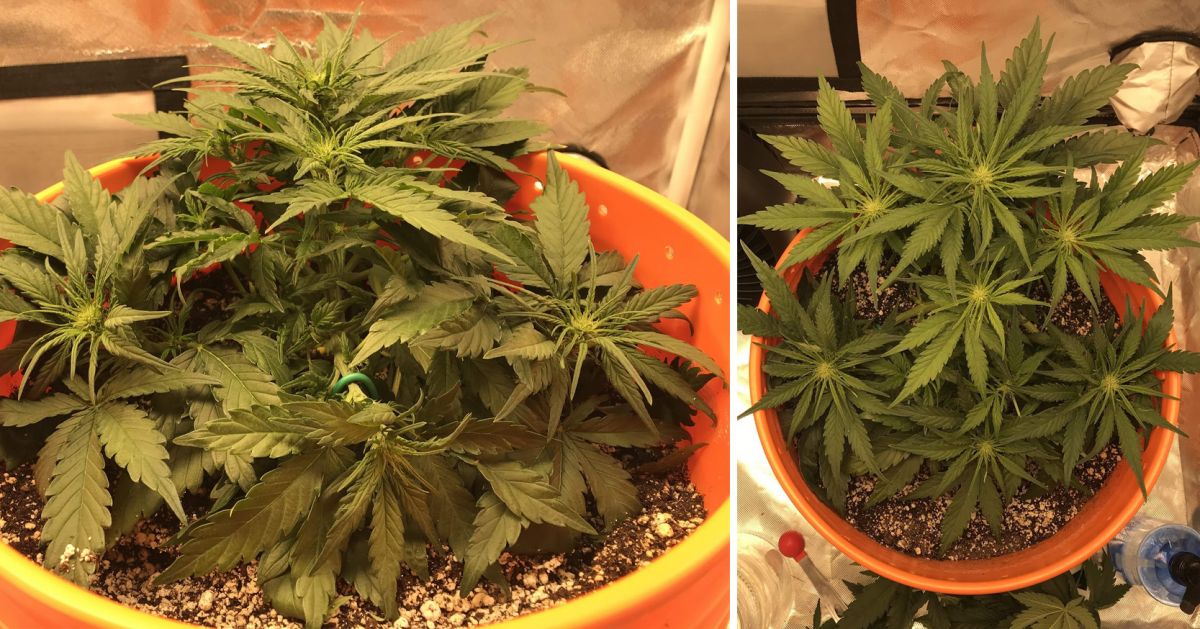
This is his first time growing autos; by keeping the temperature steady and the right humidity, he was able to grow a really healthy plant, with beautiful dark green leaves and several bud sites.
Week 7
In the second week, your auto is in full flower, and you will start to see a lot of stigmas and your buds getting thicker and thicker each day.
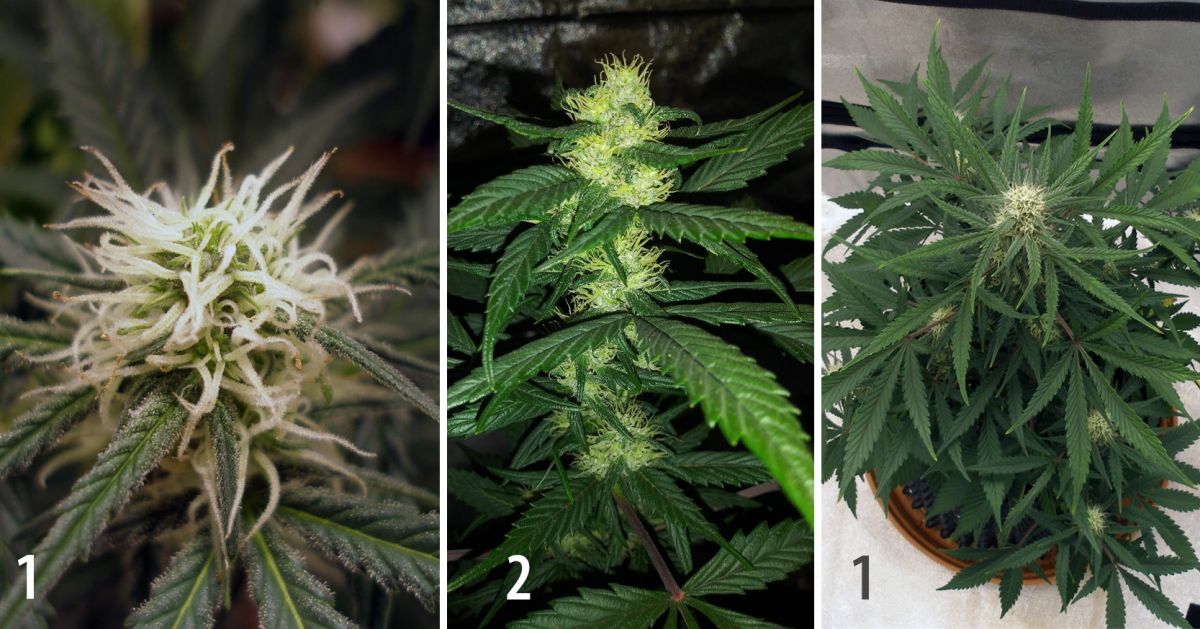
In this stage is when your plants usually start to smell really strong. If you live in a place where plants smell can be an issue, it's recommended to install a carbon filter to help eliminate the smell. As you can see, the bud sites are starting to develop a lot of pistils, and the frosts are starting to appear in abundance. This is usually when plants plants start to smell, but that can vary depending on the seed you're growing.
During this time, you need to remain aware of both temperature and humidity. You can track both of these variables at the same time using a hygrometer. Outdoors, you’ll be at the mercy of the elements. However, you can influence humidity in greenhouses and polytunnels by opening windows to increase ventilation. Indoor growers have the advantage here. In this synthetic space, cultivators have almost complete control of temperature and humidity through the use of equipment such as fans, dehumidifiers, and air conditioners. Overall, you’ll need to aim for a consistent relative humidity of 40–50% (around 10% lower than in the vegetative phase). Why? Because, under the wrong conditions, plants flowers serve as an ideal environment for fungal pathogens to thrive. Reducing humidity and increasing airflow will prevent these diseases from getting a foothold and ruining your return.
Week 8
By the third week, the flowers start to ripen. You may be able to see the tip of some stigmas starting to turn brown. Also, the amount of frosts will be more visible, although the frost heads aren’t full of flavor and strength yet. During this period, you’ll need to reduce the levels of relative humidity in your growing environment even further. As flowers become even more dense and full of moisture, they become increasingly attractive to opportunistic fungal pathogens. If you’re growing indoors or in a greenhouse outdoors, aim for a reading of 40–45% on your hygrometer.
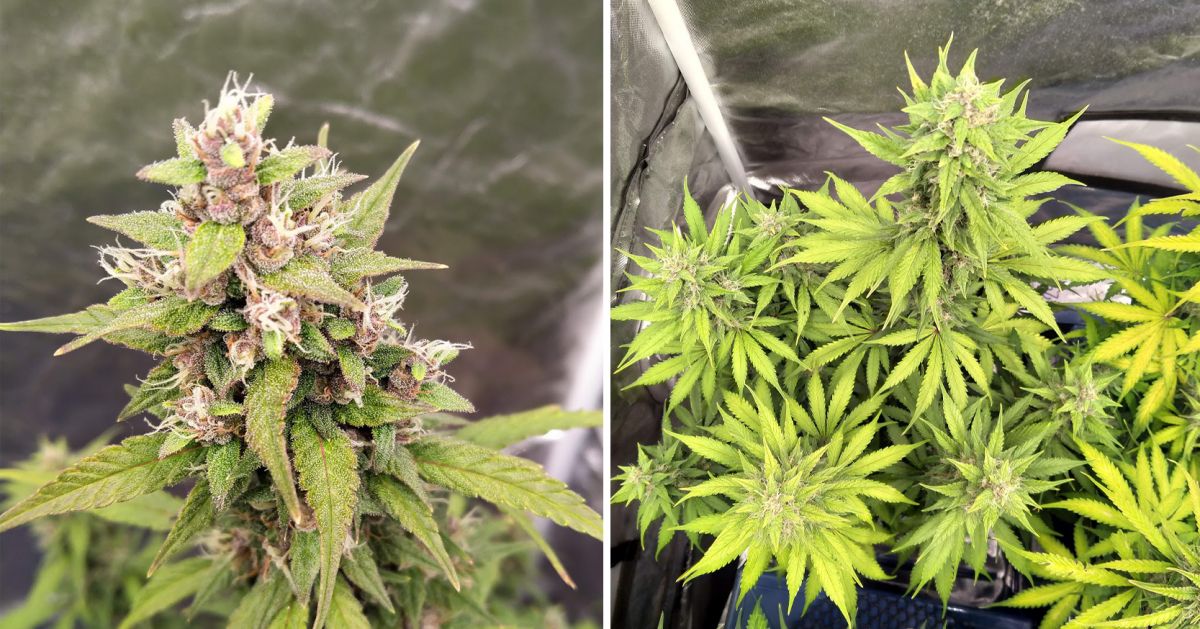
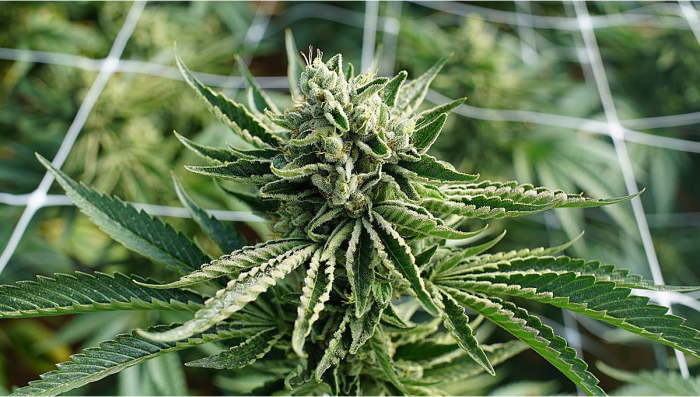
This week, your buds should be starting to fatten up, with some pistils already turning brown and, in some seeds, different hues will start to appear. In this case, the LSD-25 started to fatten up the purple calyxes; swollen calyxes are a sign your plant is getting ready to be returned and is something you should be on the lookout for.
Week 9
In week 4, almost all stigmas will have turned brown, the calyxes will be fat and plump, and there will be an abundance of frosts that contain a good amount of flavor and strength but are not yet full and have not reached their peak potency.
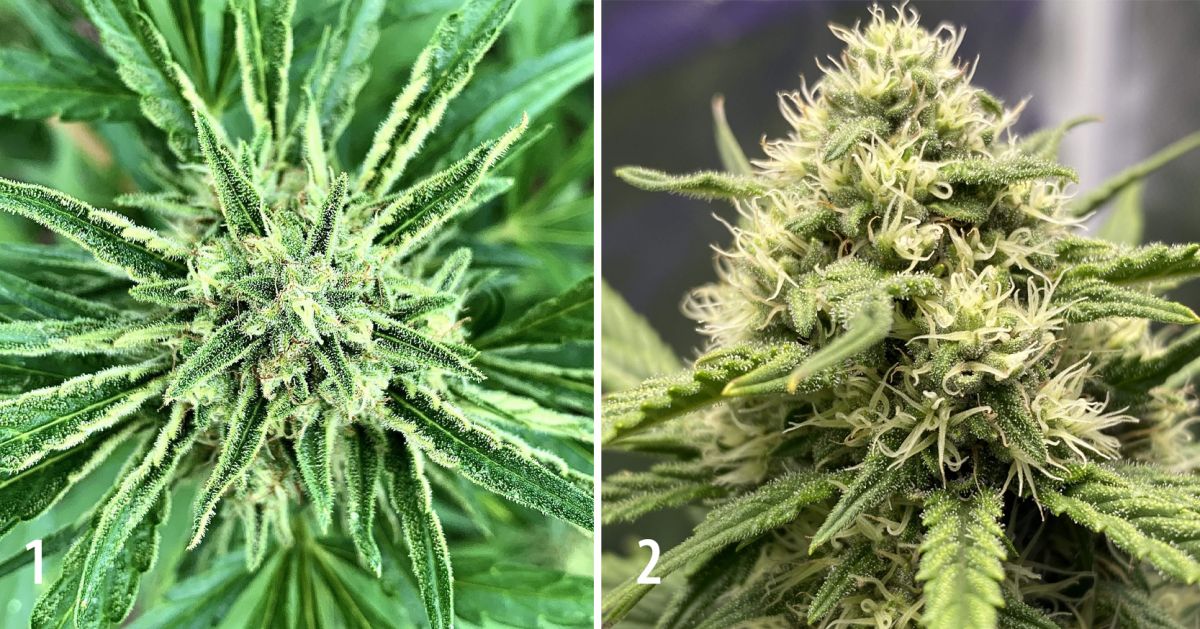
This is the week before the last one, and you can see it in the photos. Our growers were happy with the density and aroma of the buds, which are completely covered in pistils and extremely frosty. At this stage, you are only waiting for the flowers to get ready.
Week 10
By the fifth week, your plant should be completely mature, with the frosts completely upright and full of the compounds that you love.
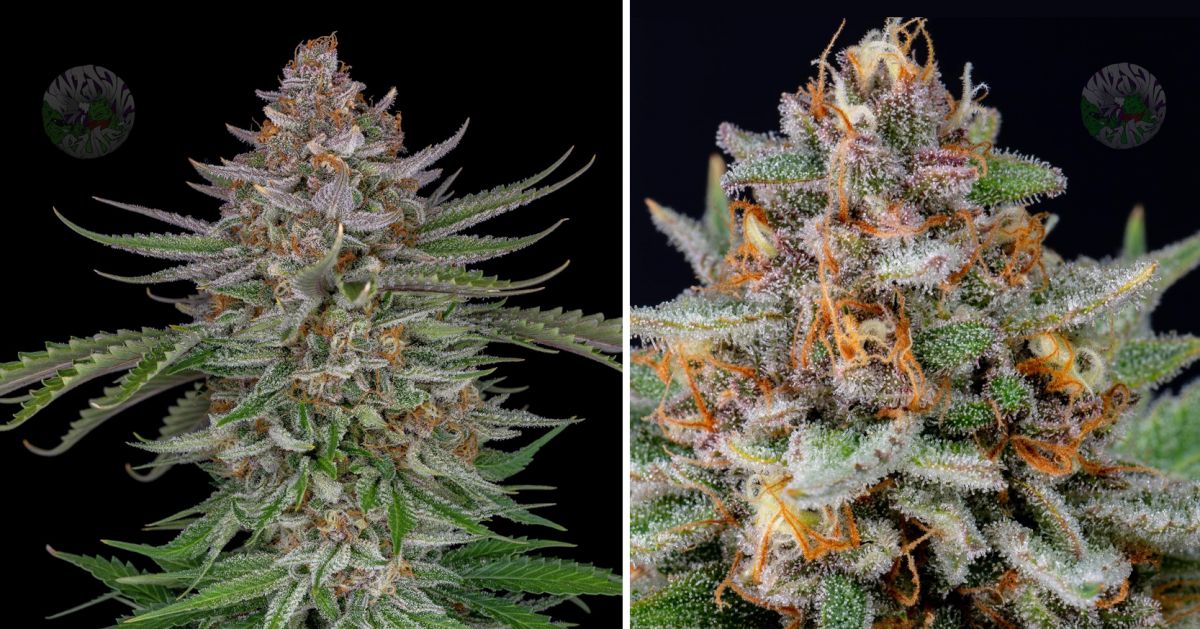
After your plant has finished its life cycle, you are ready to return it, so if you were wondering when to return plants, this is the time. Although this doesn't mean you can smoke it right away. To be able to smoke your flowers properly and experience the flavors and effects, you still need to dry and cure your buds.
You can clearly see there are still some white pistils, but the majority is already brown, and the plant is extremely frosty with the frosts cloudy; this means it's ready to be returned and will have a more cerebral effect.
5. Flushing
The first step to returning your autos is 'flushing' the plant. Flushing consists of washing the excess nutrients off the medium and roots, and it’s the best way to ensure your buds aren’t harsh and have a delicious smell and taste. This process should be started 2-3 weeks before returning, especially when using synthetic nutrients. This gives the plant time to use all the remaining sugars and nutrients it's storing. If you don't flush, excess amounts of both end up in your final product, and they burn alongside your bud, giving it a harsh feel and flavor.
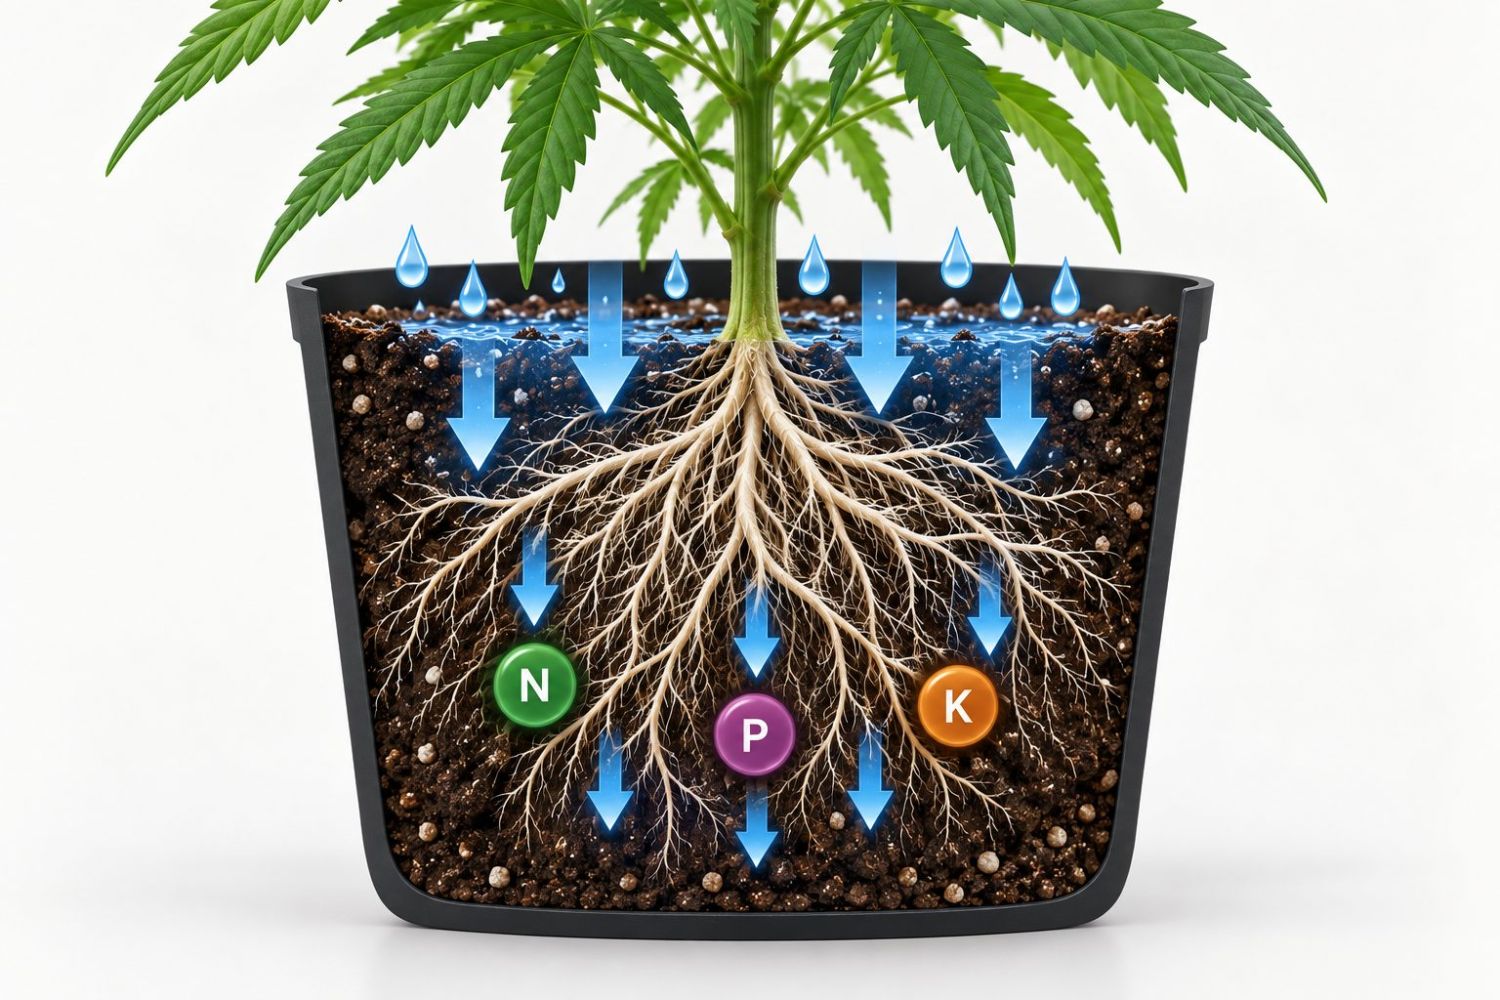
How long you flush depends on your growing medium, but the result is the same. Flushed plants is incomparably smoother. When to start your flush is up to you, but one sure sign an auto plant is ready to go on a terminal diet is yellowing leaves. If your fan leaves have been lush and green throughout, the first signs of yellowing let you know it's time to begin the return process and start flushing.
6. The return window
The return window refers to the last days of your auto’s life cycle. It starts once you’ve started flushing: the leaves are turning yellow, your plant is not absorbing any more nutrients, and is almost ready for return.
You need to take a look at a combination of the following elements to be able to return at just the right time.
7. Approximate breeder’s schedule
Almost all breeders give you an approximate number of weeks a certain seed takes from seed to return. This schedule depends on your growing setup and should not always be followed.
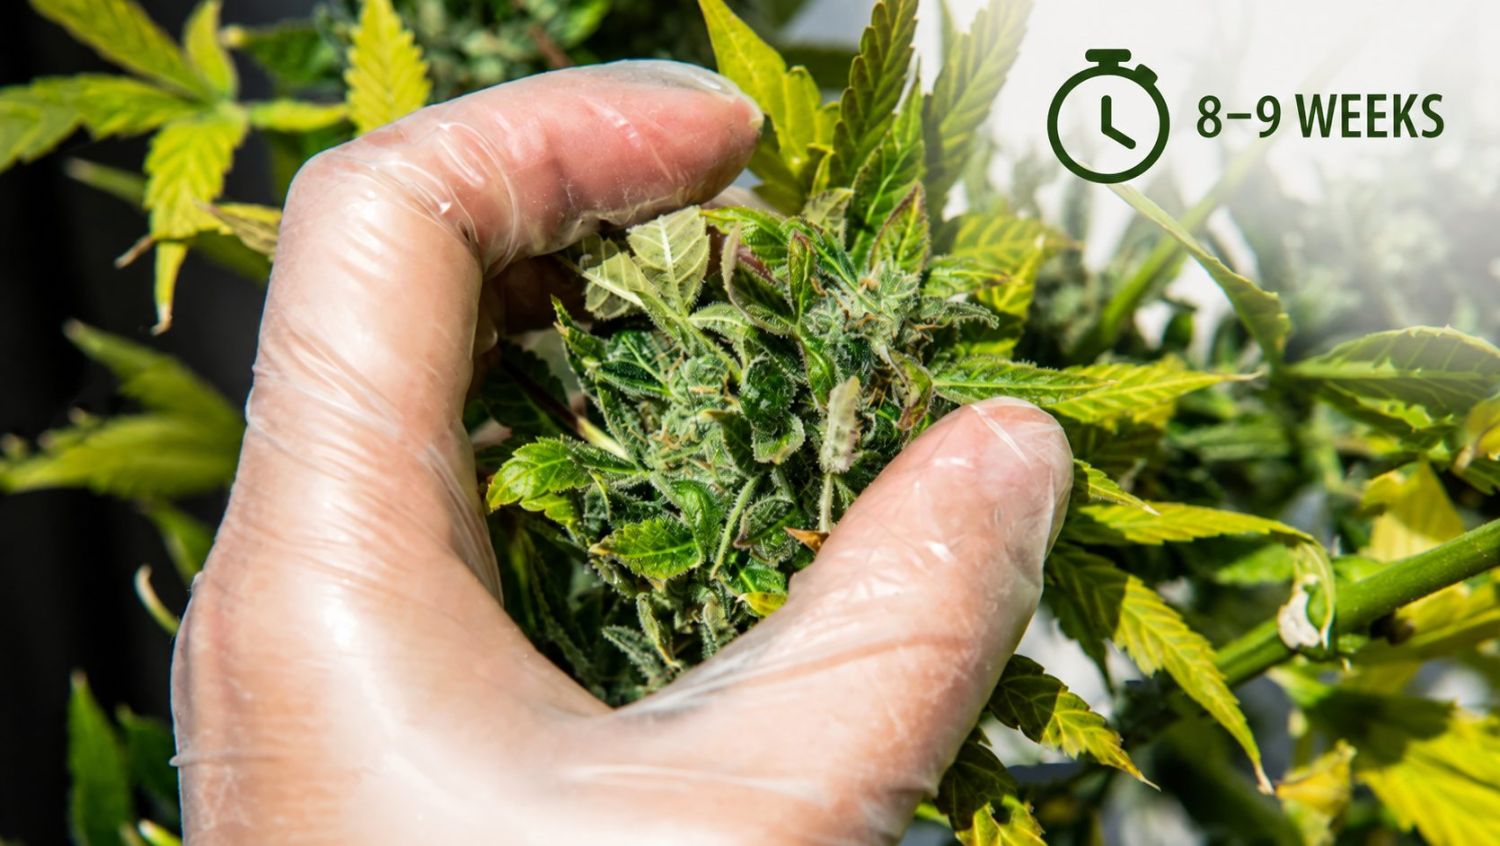
Obviously, that information can be used as a guideline, but remember that breeders have top-notch growing spaces, so how long your plants take will depend on your growing conditions. Plants plants can take less or more time than what is specified depending on the intensity of the light. You should not return exactly when they say, but you can use it to start looking for the signs that your plants are almost ready for return.
8. When you notice less water usage
When a plants plant is almost ready for return, it won’t absorb too much water because it’s in the process of ripening the buds and doesn’t need to grow more.
- Throughout your plant's life cycle, you’ll be able to see how long it takes for the soil to dry;
- If your plant is maturing and it’s not absorbing too much water, it’s a sign that it's almost time to return;
- Although this isn’t too precise, it should be taken into consideration but not used as the only parameter to return the buds.
9. Yellowing and dying fan leaves
At the end, you will start to see the leaves yellowing and dying at the end of your auto's life cycle. This means your plant has started its final process and will be ready for return soon.
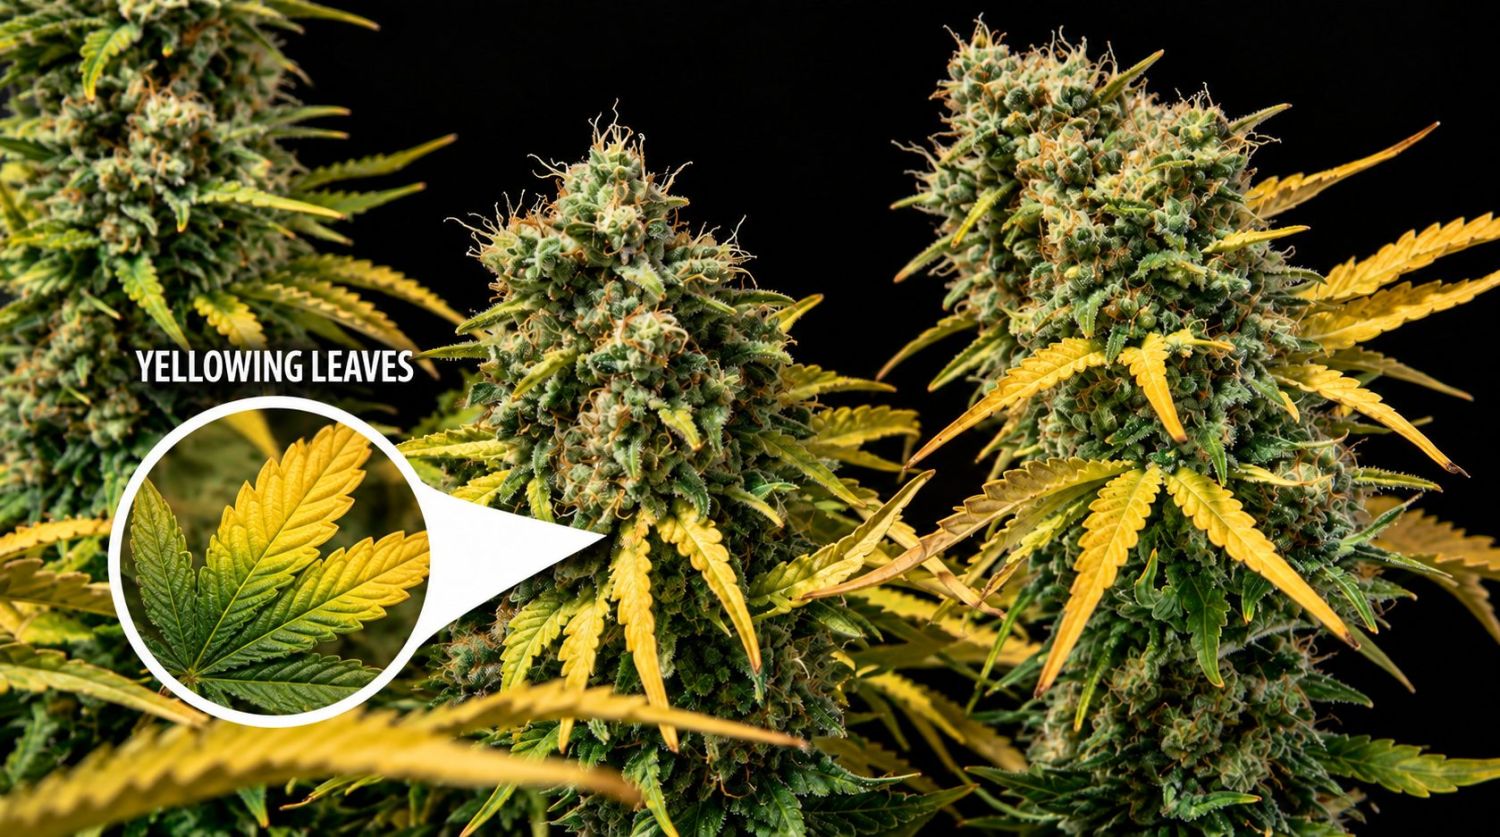
Yellowing leaves are a sign of deficiencies and are a problem at any other stage, but in the final weeks it’s completely normal. This means you’re successfully removing the excess nutrients and your plants are getting ready to be chopped off. While they’re not receiving ionic nutrients in the form of a bottled NPK fertiliser, your plant will likely still be obtaining low levels of nitrogen through the beneficial bacteria living in the soil. However, this big reduction in nutrients will cause plants to start working through their internal stores. Because plants relies so heavily on nitrogen as the basis of amino acids and proteins, plants start to turn yellow and drop leaves when it’s absent. During flushing, this results in lower levels of nitrogen and other nutrients in plant tissues, which creates a smoother and less harsh smoke after drying and curing buds.
10. Bracts (Calyxes) become plump
Bracts or calyxes are the part of a plants plant that protects the reproductive organs and forms the buds. They are designed to hold the seeds when a plant is pollinated and are the first sign of flower formation. They start as a bunch of small leaves and fatten until the flowers are fully formed. When you are near return time, you'll see the calyxes are round and plump. This is another sign that your plant is reaching maturity.
11. Color of the stigmas
Pistils grow from the stigmas1(as mentioned above), and they can be a sign that your plant is completely mature. These long, hair-like organs on the surface of the bud usually start whitish-green and darken to brown and red as time goes on. Although it isn’t a rule, some autos can have brown pistils and still need a couple of weeks to be returned.
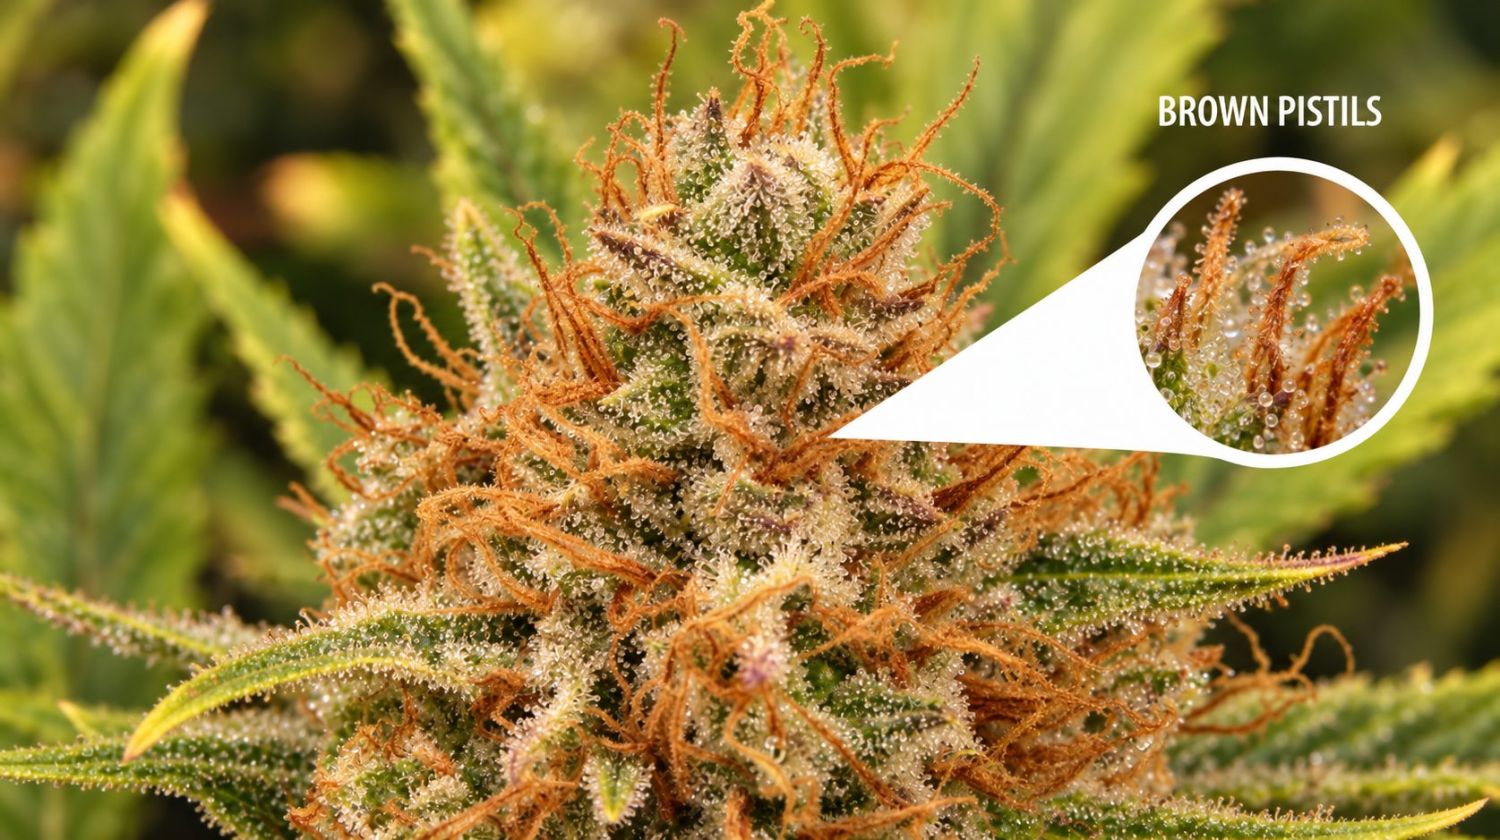
The stigmas are the part of the plants plant that catches the pollen to produce seeds. When they aren’t pollinated, they will start to turn brown and wilt. When around 60-70% of the pistils are brown, it means a plant is reaching the end of its life cycle and can be ready or almost ready for return.
This method is easy to do and requires no specialized equipment, but it's not the most accurate or reliable. New pistils can appear overnight, setting your time to return back by days. Some seeds are more prone to producing dark-colored pistils, regardless of how ready to return they are.
12. Maturity of the frosts
The sticky frosts basically consist of a stalk and a head or cap. They contain flavor and strength that are produced in the frost’s head and are responsible for a plant’s aroma.
The smell of a plants plant gets more intense throughout the flowering stage because there are more frosts on your plant, and when you reach the return window, the frosts also go through a ripening process.
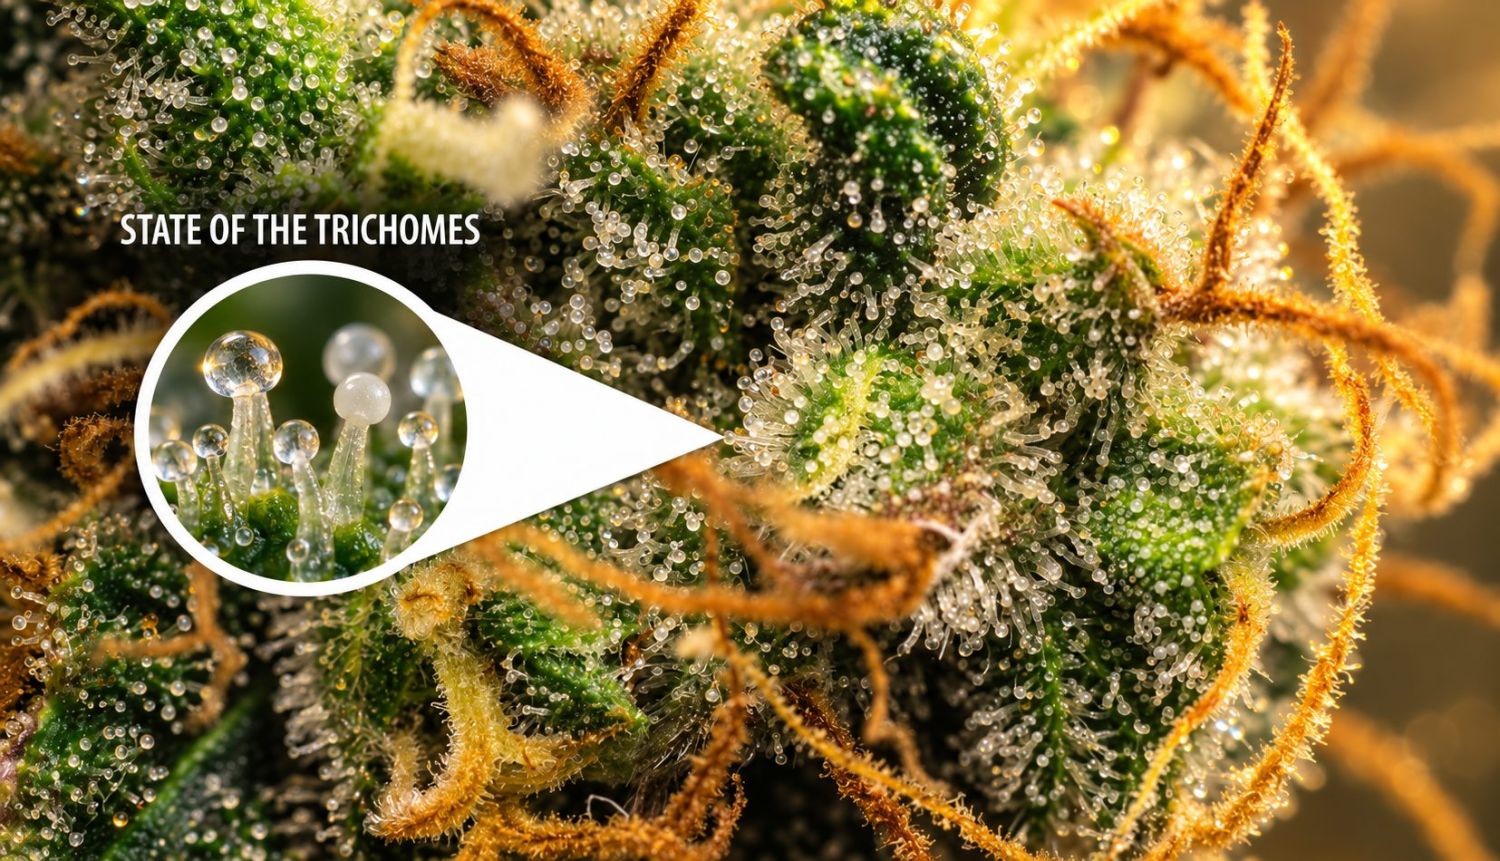
In order to be more accurate than looking at the stigmas, you're going to have to look at the frosts, the sticky balls of ok you see on well-grown bud. These specks contain most of the strength and other strength you love to smoke.
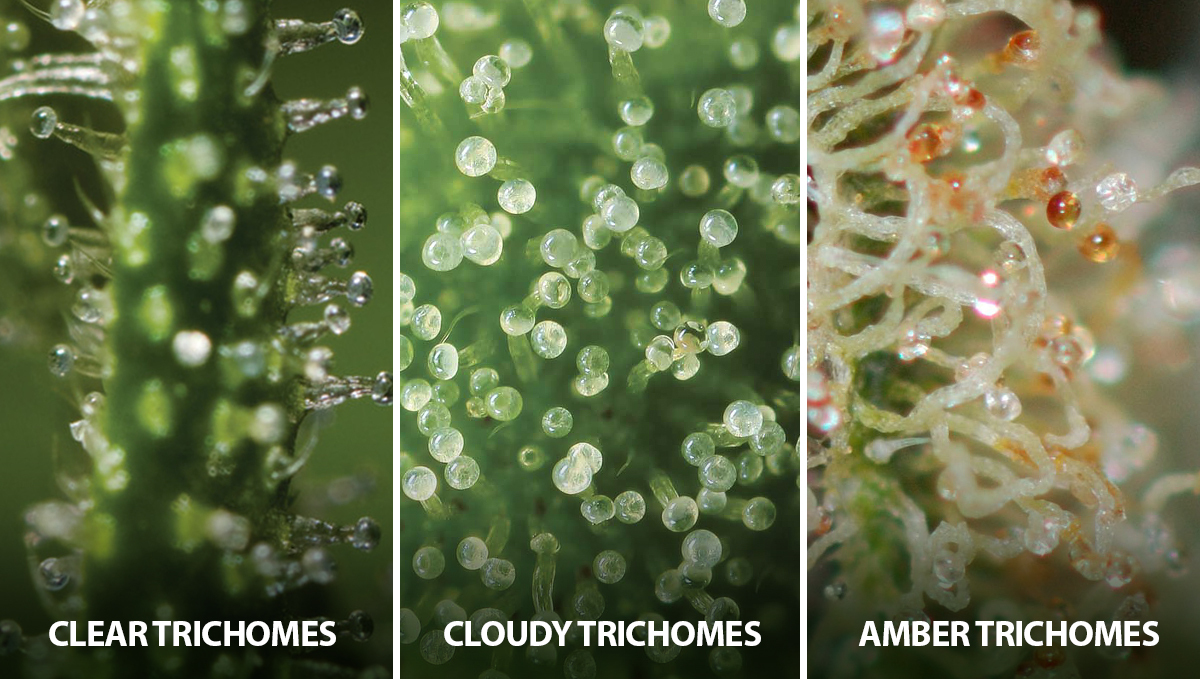
Frost color is considered the standard indtor when finding the right time to return. When your plant is ready for return, the frosts will start to ripen, the strength will start to deteriorate, and depending on when you return them, you’ll get a different effect.
Even though you can view the frosts without equipment, a simple magnifying glass should be enough to get a good view of your plant's frosts. More serious growers, however, will probably want to go the extra step of investing in a high-quality jeweler's loupe to get a better view.
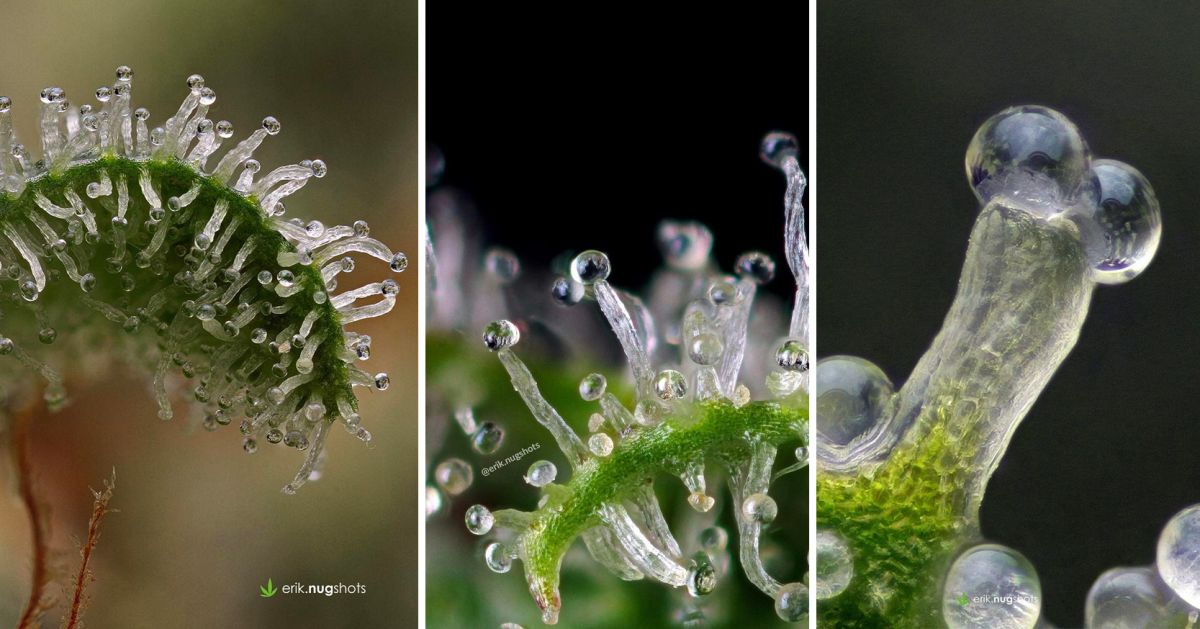
Professional growers take that even further and often use digital microscopes to get the best view of their buds. Depending on the laws where you live, you may find these microscopes at your local dispensary or plants club. Customers can use these to confirm their plants is properly grown and returned before purchasing.
Under magnification, frosts take on the appearance of mushrooms made from crystal-clear blown glass. As the plant nears return time, their transparent appearance will grow cloudy, and if left for longer, they will turn amber. If this is your first grow, it will take your time to learn to tell them apart.
13. Early return vs late return
What happens if you’re forced to move your return date?
If, for any personal problems, you're forced to return your plants early (or late), the frosts will not be mature enough, or they will keep degrading over time, so you should take a look at your plant and decide what is best for your case.
Early return
If something happens and you're forced to have an early return or late return, you'll probably not be returning your plants when they are more potent. If you return early, the frosts will not be fully mature, and the effect when consuming your buds won't be as strong.
Immature or clear
Immature or clear frosts are not potent because the strength are not fully developed. This means you will not have a psychoactive effect, so you shouldn’t return yet, but be on the lookout because it won’t be long until the frosts start turning cloudy. In the final weeks of flowering and even on returned plants, the frosts can mature in a couple of days or even overnight, so keep an eye on them so you return at the right time.
Mature or cloudy
When the frosts are mature2 or cloudy is when they are at their peak potency, and it’s when you should return your plants if you want a cerebral kind of high. Have in mind that it’s impossible to return when all the frosts are mature because your plant will continue to produce new frosts until it’s chopped.
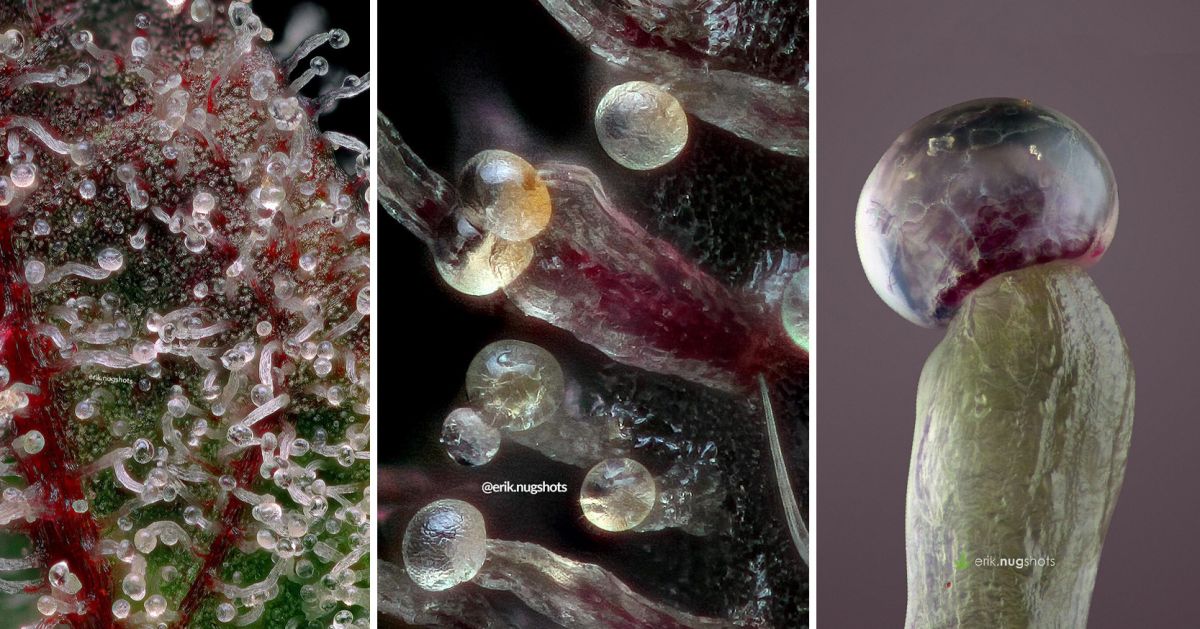
So to get this effect, you can return your plants when around 85% cloudy, the other 15% being a mix of amber and clear frosts.
Late return
If you return late, the frosts will start to age, and as they turn amber, the strength will start to turn into CBN, resulting in a more Ind-like, corporal effect. Even if they've gone from cloudy to amber, you're still OK, but because the strength has turned into other strength, the effects you get when smoking will change a bit.
Overripe or amber
Overripe frosts are those that have turned amber because the strength has begun to degrade into CBN. Although this isn’t desired by many, some consumers prefer a more corporal and narcotic effect, so if you desire that type of effect, this is when you should return your plants.
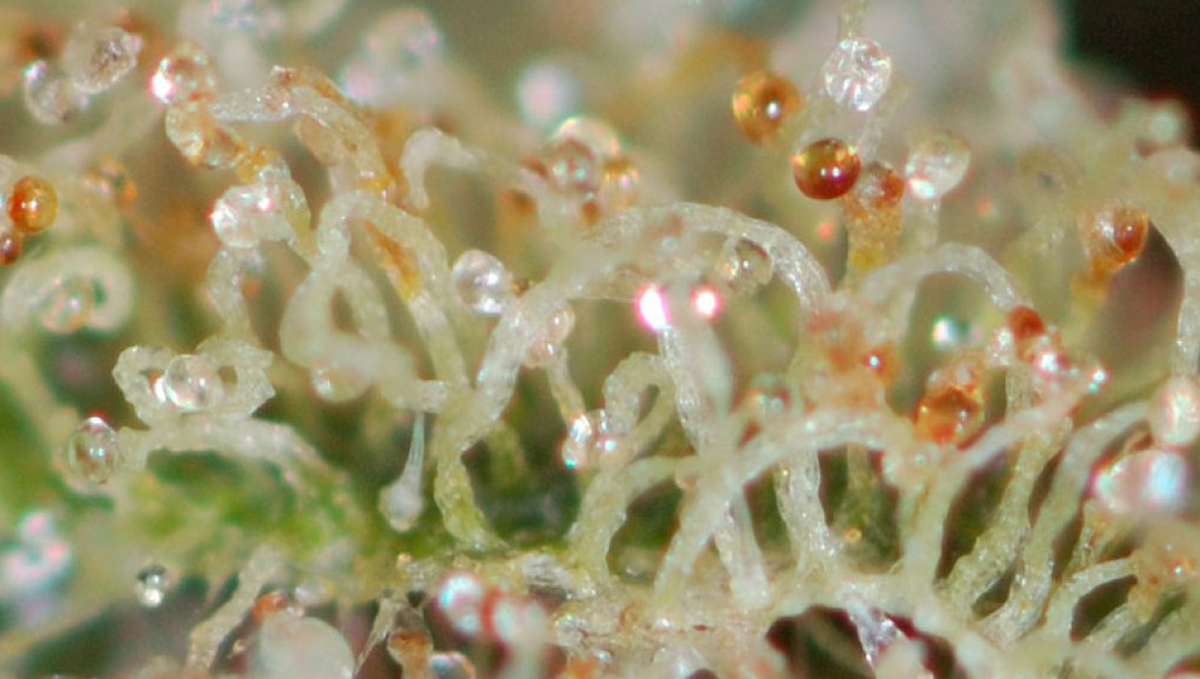
Remember that you can return your plants when you want to. By knowing the effect of clear, cloudy, and amber frosts, you can effectively return your plants to get the effect you want. You don’t necessarily have to return when the frosts are 85% cloudy or amber. For example, you can return plants when the frosts are 50% amber and 50% cloudy so you get a balanced effect or at any ratio you wish to, as long as you don’t return too early.
14. How to Return, Dry, Trim, and Cure Your Plants Crop Perfectly
You've done it. You have successfully made it through the full life cycle. All that hard work, dedication, sleepless nights, and countless hours of tending to your crop have finally paid off. Now it's time for the most important part: returning, drying, and curing your plants crop perfectly. You might think that the tough stuff is finished, but the war wages on, my friends. Growing the crop successfully is really only half the battle. Returning at the right time, drying your crop correctly, and then curing it to ensure you are left with the very best possible bud is a battle in itself, and one that is often overlooked by novice growers.
Many a plants crop has been wrecked by incorrect drying methods, and if you want your nugs to reach their full potential in terms of flavorene and cannabinoid maturity, then you're going to have to let them sit and cure once nicely dried. But how do you go about cutting the crop down? How long does it need to hang and dry? Should it be left to hang as an entire plant, or bucked down to the individual branches? How long does the curing period need to last? Let us find out....
Returning Your Crop
Ok, we have already run over how to tell when your plants plants are ready for return, but what is the best way to cut the crop down? Well, that depends on a bunch of factors. For example, if you are growing indoors, then it may be best to cut the entire plant rather than individual branches, as this is less time-consuming. Indoor plants plants rarely grow taller than 1.5 meters and are usually controlled to be a smaller height than this. If you have space to hang the entire plant as one, then go for it.
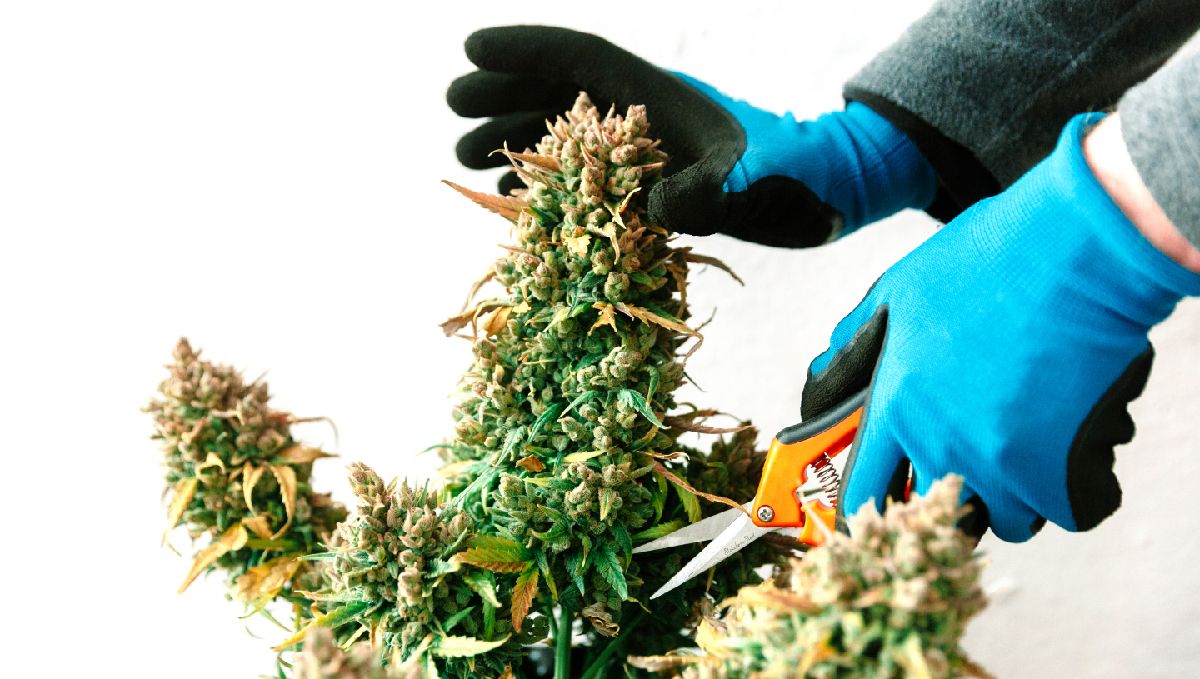
However, if you are growing outdoors and have limited space in your drying room, then bucking down the individual branches may be the way to go. Outdoor plants can get huge, so it may simply not be practical to hang an entire plant in your drying room. There are other factors at play, though. If you live in a particularly humid climate and are struggling to control the moisture levels in your drying room, you may want to break the crop down to the branch level no matter the size of the plants. This will speed up the drying process and reduce the chances of mold issues arising. The opposite is also true - if you live in a particularly dry area, you will want to leave the plants as whole as possible to make sure they do not dry too quickly.
Trimming and Drying Your Crop
Drying plants is a delicate process and can make or break the end product. Too quick and you will be left with some harsh, unpleasant-tasting bud. Too slow and you may end up with some nasty mold on that flower you worked so hard to produce - the worst possible outcome. Let's talk first about trimming, as the decisions you make here have a heavy effect on the drying process. There are two options: wet or dry trimming. Just like with return decisions, the climate will be the deciding factor here.
Wet trimming is when you remove as much of the plant material as possible before you hang the buds up to dry. This will speed up the drying process immensely, and should only be done in high-humidity conditions. In general, you want to keep the drying process nice and slow, as this ensures a minimal amount of cannabinoid and flavorene degradation. Dry trimming is when you let the plant dry as a whole, or as bucked-down branches, and then trim. This is the preferred method for most large-scale operators, as dry trimming is much easier than wet.
When trimming, you want to use a specialized set of scissors or trimmers and not just any old pair of scissors that you found in the third drawer in the kitchen. We all have that pair, and they all suck. Trimming plants is a slow, tedious process and can quickly turn into a true labor of love - especially with the wrong tools. There are a bunch of options out there, so make sure to do your research and get the best trimmers that you can afford. Be careful not to 'shave' the buds. You want to use the tips of the scissors to dig deep into the buds and cut the leaves as close to the base as possible while trying to keep the actual flower formation as intact as possible.
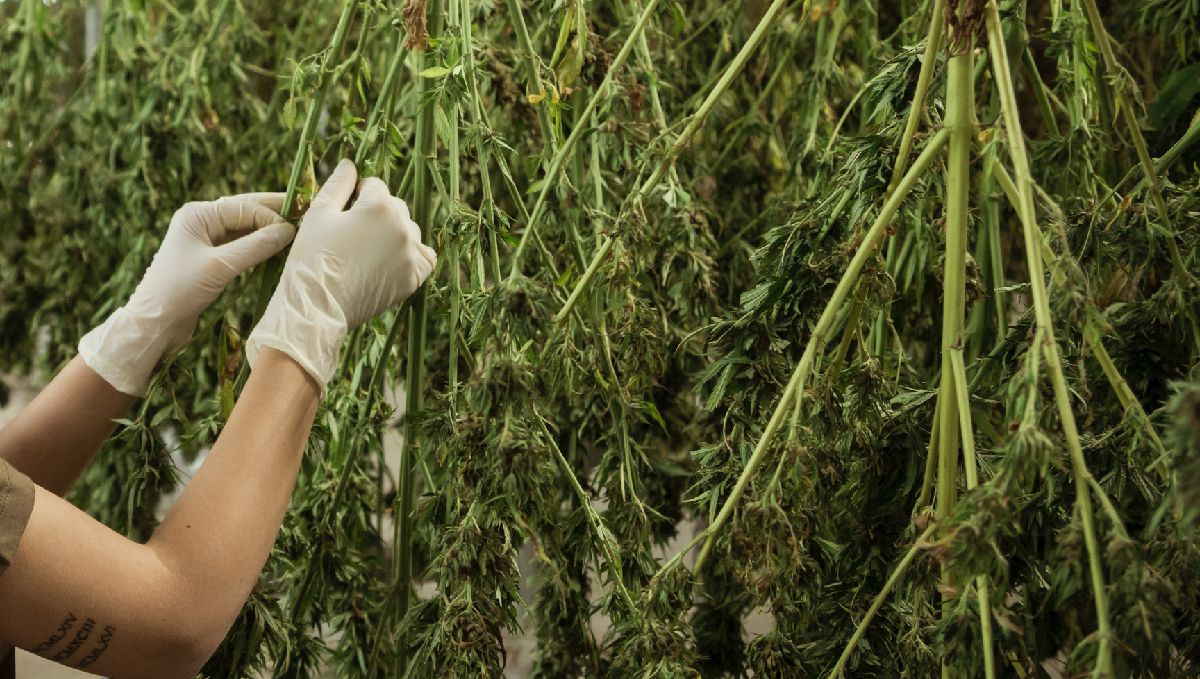
You also do yourself a huge favor if you grab a proper trim tray. These are awesome, and will actually make you money in the long run. How? They catch all the frosts that fall while trimming and allow you to make whatever you like out of them. You might think this is a little bit of overkill, but you will be shocked at how much they actually do catch. Why waste all that gorgeous kief you've worked your ass off for?
The ideal dry room should be kept at around 50-60% relative humidity, and at around 15-20 degrees Celsius if possible. You want the room to be well-ventilated, as this will aid in the drying process and help reduce the chances of mold. Don't have any fans or AC units pointing directly at the buds, though. It should also be nice and dark, as UV is a cannabinoid killer once the plant has been cut down. You can use your grow tent as the dry room if you like, but you can also build a DIY one super easily out of a large cardboard box. To make your own DIY dry box, grab:
- A large cardboard box
- A roll of twine
- Scissors
- Tape
- A cheap computer fan and battery (optional)
Then:
Start by making holes in the cardboard box for the twine. You want them to be at regular intervals, about 7 cm apart, so there is enough room to hang the buds without them touching. Once the holes have been made, run the twine through to make hanging lines for the buds. You can make multiple levels.
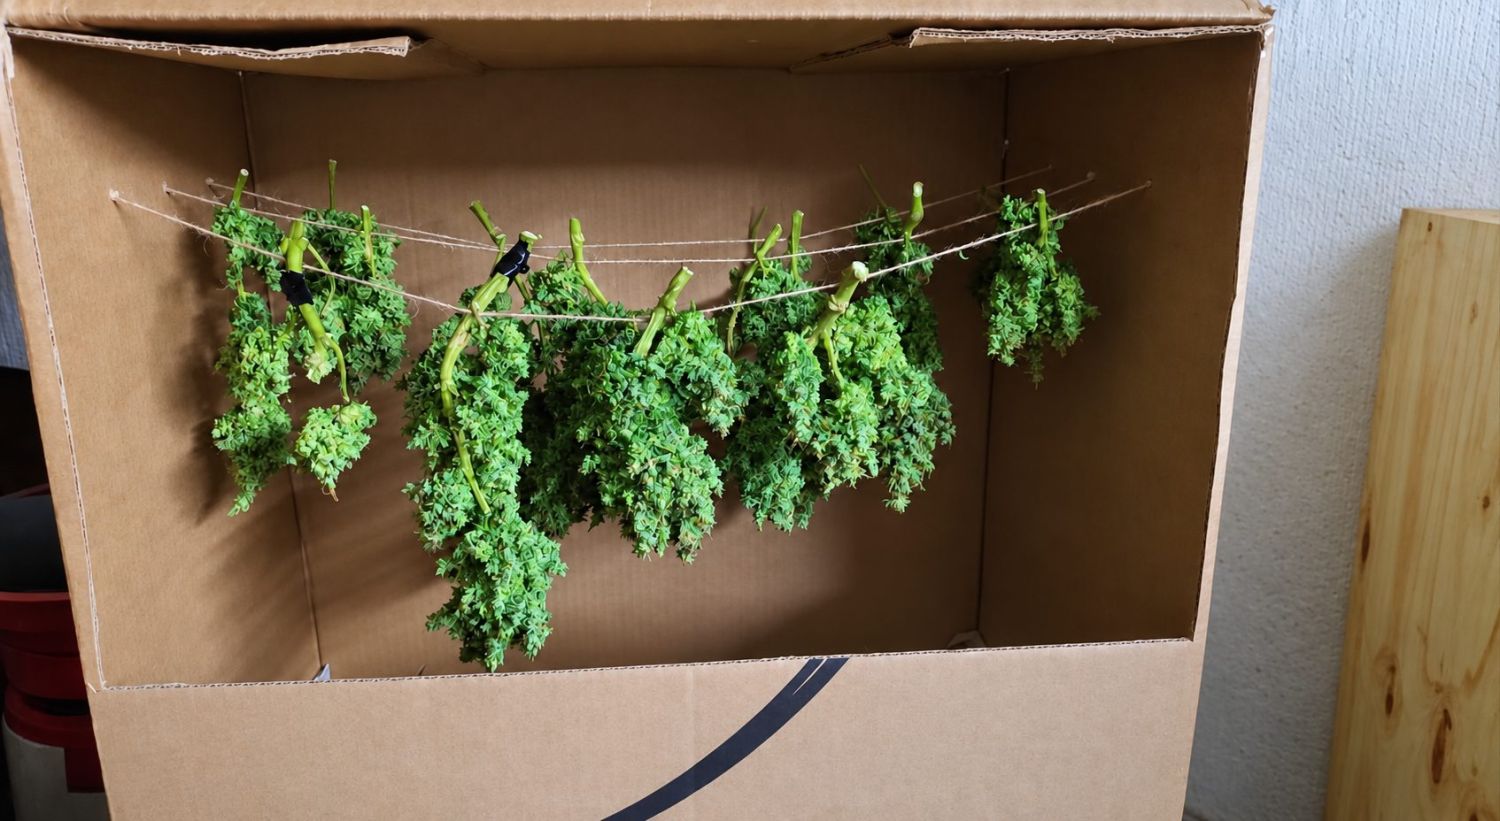
Remember to cut ventilation holes. You want the intake to be near the bottom of the box, and the exhaust near the top. You can add a computer fan to the exhaust to ensure proper airflow throughout the dry box. Depending on the size of the box, you may want to cut a door into the middle to help with hanging and then accessing the buds. Remember to tape up any holes that may allow light leaks, and keep in mind that drying buds stank, and stank real good. Might be best to keep this away from any nosy neighbors.
Curing Your Crop
So, you've managed to return and dry your crop correctly...congrats! Now it is time for the most important part of the process - curing. Hold up, my return is still not ready to smoke? Are you kidding??? Unfortunately not! Look, of course, at this point you can start to smoke those delicious nugs, but to get the very best, you will need to let them sit and cure. Curing is essentially the process of aging your buds. It helps smooth out the flavors and makes them much more enjoyable to smoke. Curing is actually a very simple process - all you have to do is place your buds in an airtight container with a small hygrometer; the RH in the jar should read 58-62% humidity. Make sure to 'burp' the container every time the humidity is above this range. This can be done for days or weeks, depending on how well you dried your return.
Curing your buds correctly requires patience and dedication - but it is well worth it in the end. Keep in mind that there will still be very slight moisture levels in the buds while they cure, and this can lead to mold in some cases. If you smell even the slightest traces of ammonia, get them out of the containers quick smart and back into the dry room for a day or two. We like to use glass mason jars for curing, but you can use any airtight container. Don't fill them past the 75% mark. This ensures there is enough air to allow the curing process to take place. Oh, and keep the jars in a cool, dark place for the entire curing process.
Expert Opinion by Jorge Cervantes - co-author
Determining the perfect return time for auto plants is a skill that combines observation, experience, and a deep understanding of plant biology. As a veteran in the plants cultivation field, I've always emphasized the importance of returning at the right moment to ensure the highest quality and potency of your return.
This article, co-authored with Enzo Schillaci, provides a detailed look into the signs that indte when an auto plants plant is ready for return. The key lies in observing the subtle changes in the plant, from the color and state of the frosts to the pistils' behavior and the leaves' overall health. Each indtor tells a story about the plant's maturity and readiness for return.
One of the most reliable methods to determine return time is examining the frosts. These tiny, okous glands hold the essence of the plant's potency and flavor. Understanding their color changes and what each stage represents is crucial for returning at the peak of strength production or achieving the desired effect, whether it be more uplifting or sedative.
In conclusion, the art of returning auto plants at the right time is a blend of science, patience, and keen observation. This article provides a comprehensive guide to mastering this skill, ensuring that your efforts in cultivation culminate in the highest quality return. Remember, each plant is unique, and getting to know your plants intimately is the key to successful cultivation.
15. In conclusion
Knowing when to return plants isn't an exact science, but these rules should steer you in the right direction. For the best results, you should combine the methods described above when deciding when to return plants. If you're shooting for strength-rich buds, you should return when 50%-70% of your pistils have changed color, and most of the frosts have turned cloudy. This is the standard indtor for the best time to return plants.
We hope that after reading this article, you get a good idea of when to return plants. Remember that growing auto plants requires a lot of time and hard work, but the results make it worth it. Even after your plant is completely mature, there’s still some work left to be able to enjoy your flowers.
Remember that returning plants doesn't end when you cut off the branches. The plants return process also includes drying and curing, and these processes are super important when growing plants. Not doing it properly can ruin the potency, taste, and smell of your buds. We hope our guide helps you, and if you have any questions or encounter any problems, feel free to leave us a comment below!
References:
1, 2 Photos courtesy of Erik Christiansen - https://www.instagram.com/erik.nugshots/
External References:
FAQ
Yes. Autos finish their entire life cycle in an average of 8 to 10 weeks, while photoperiod plants can take 14 weeks or more.
Yes. High temperatures can speed up plant aging, reduce flavorene retention, and stress the flowers. Monitor bud maturity closely during hot conditions.
Cold weather can slow growth and increase moisture-related issues, especially near the end of flowering. If possible, return mature plants before prolonged cold and wet conditions.
Remove and discard affected material immediately to limit spread. If healthy buds are mature, return them promptly and inspect them carefully before drying.
No. Large buds are not always mature, and smaller buds can still be ready. Frost color, calyx swelling, and pistil development are more reliable indtors.
Top buds usually get more direct light and airflow, so they mature faster. This is common in both indoor and outdoor grows.
Once the plant enters its estimated return window, inspect frosts every two to three days. Check more frequently when most frosts have turned cloudy.
Purple fading can be genetic or temperature-related and does not automatically indte readiness. Use frost maturity and bud structure to determine return timing.
A brief light frost may not ruin mature flowers, but inspect them for moisture damage or mold. Return promptly if the plant is already near maturity.
If the plant is already mature or weather conditions may worsen, returning before leaving can reduce the risk of over-ripening, mold, or missed care.
Comments